Register and Account Settings
Register your firm
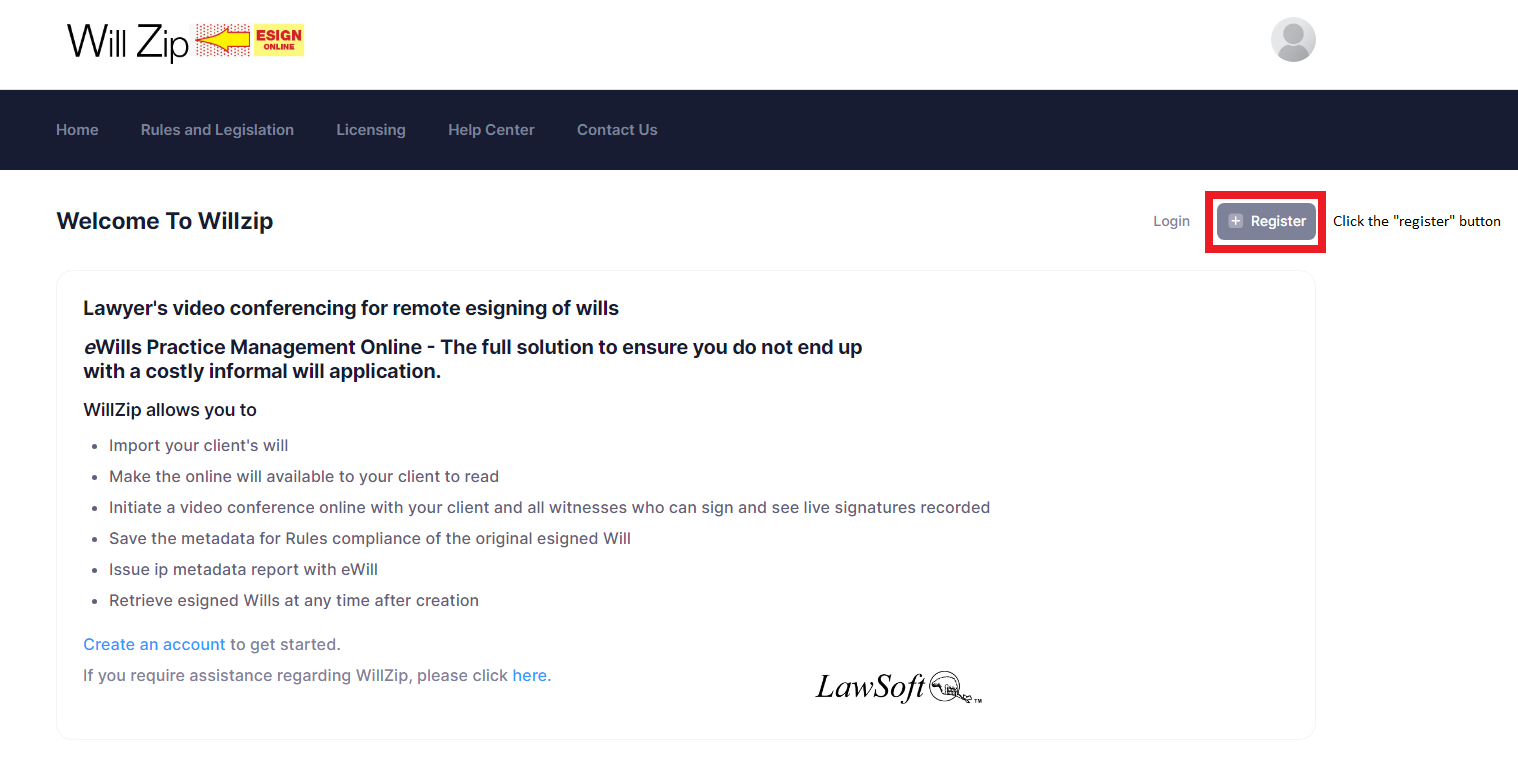
Click on “Register”.
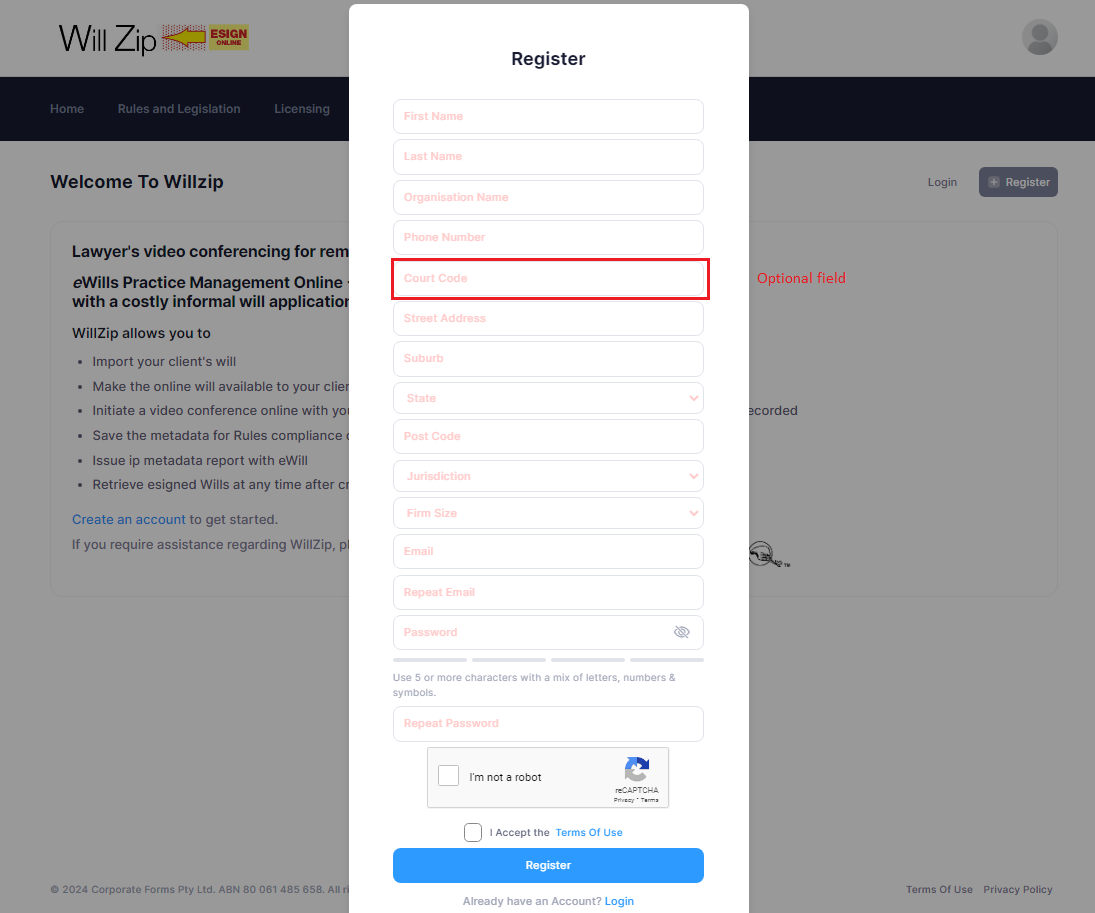
Complete your firm details (with “court code” being optional). Once you have filled out all the required fields, accept the “terms of use” and click “Register”.
An email is sent to you confirming Registration and asking you to set your login passcode.
Upon registering you will be the Managing User, by the default, and you can enable other Users.
Edit Details in Account Settings
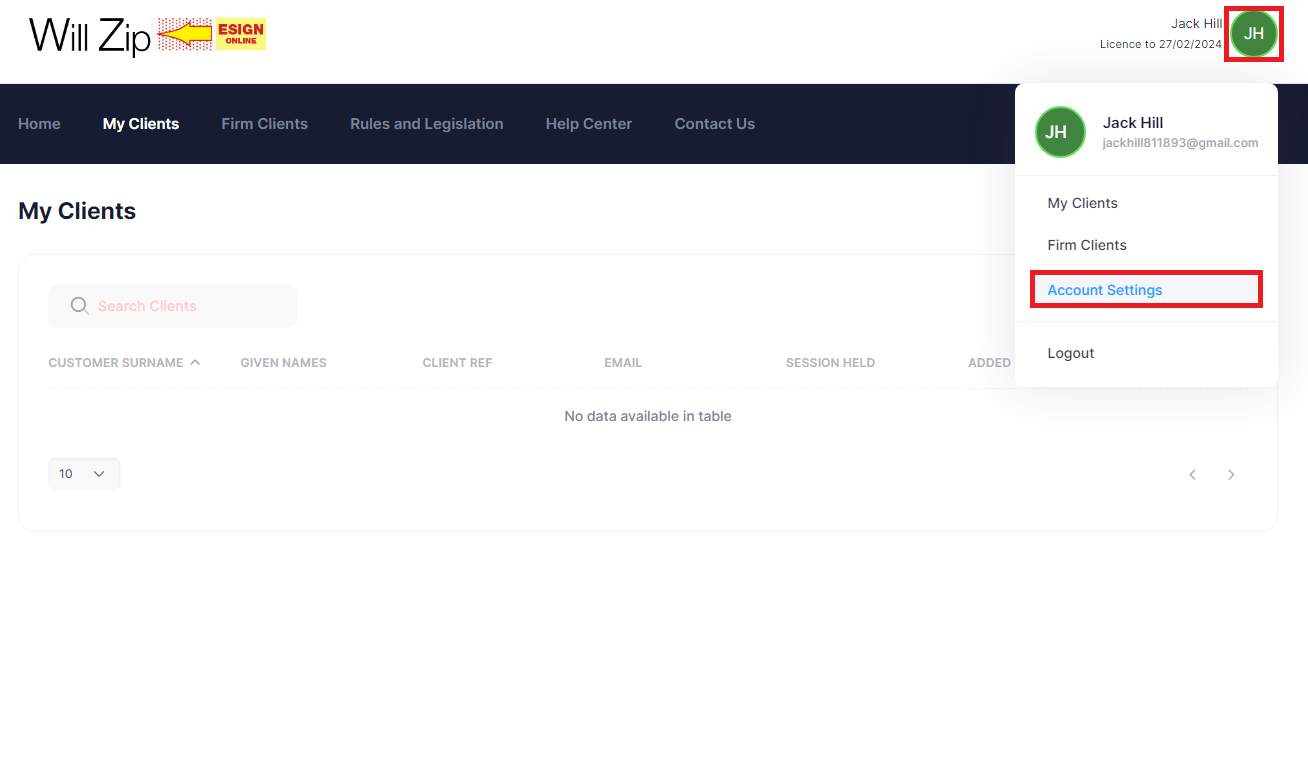
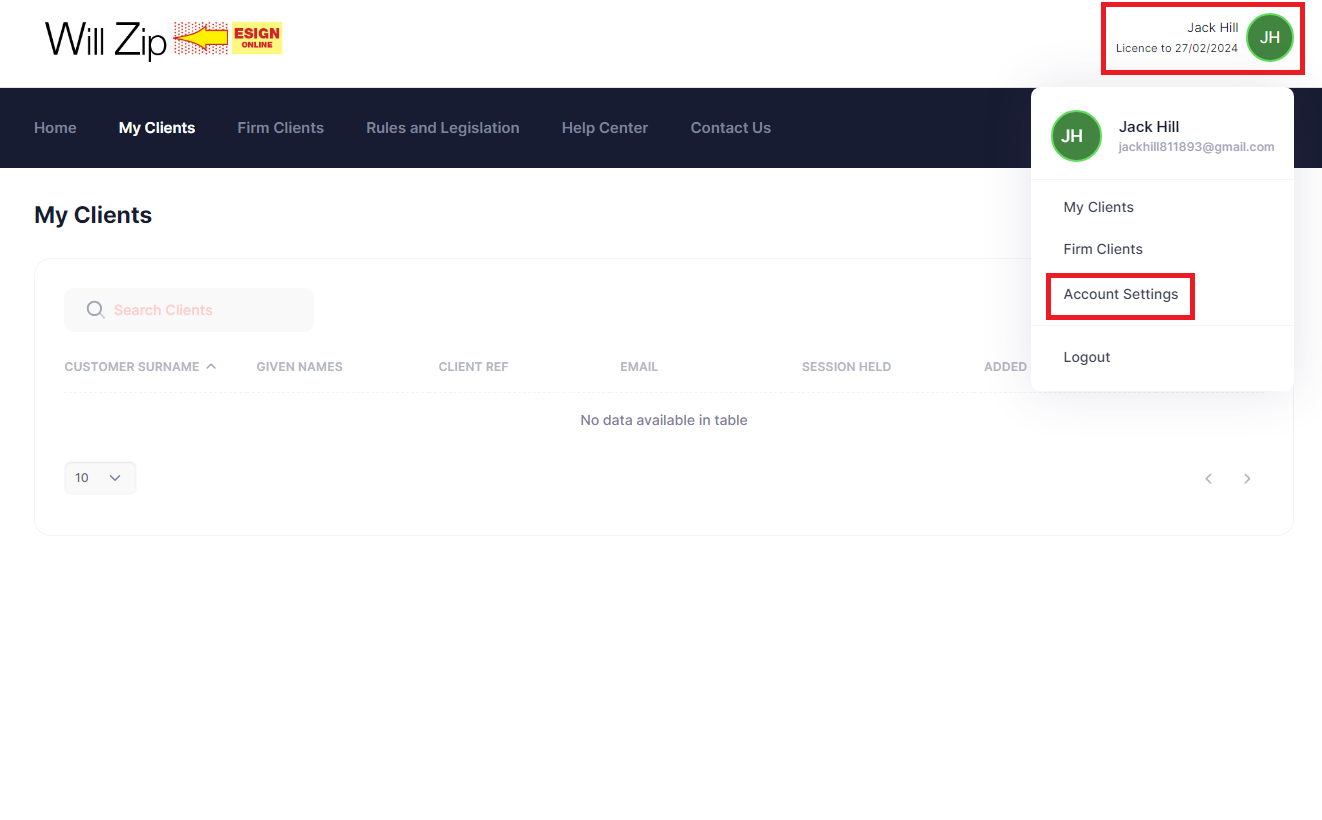
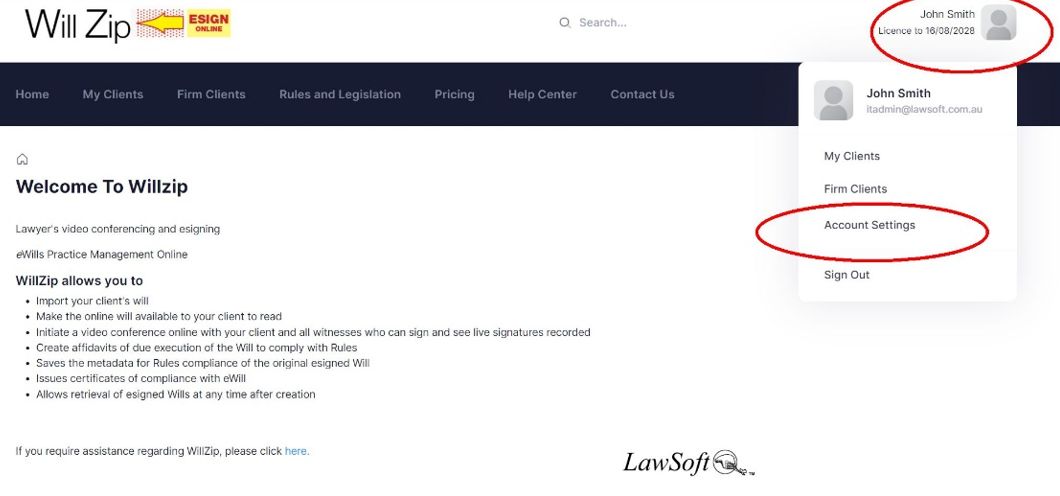
Log in as a User of the firm and hover over your profile icon in the top-right and click “Account Settings”.
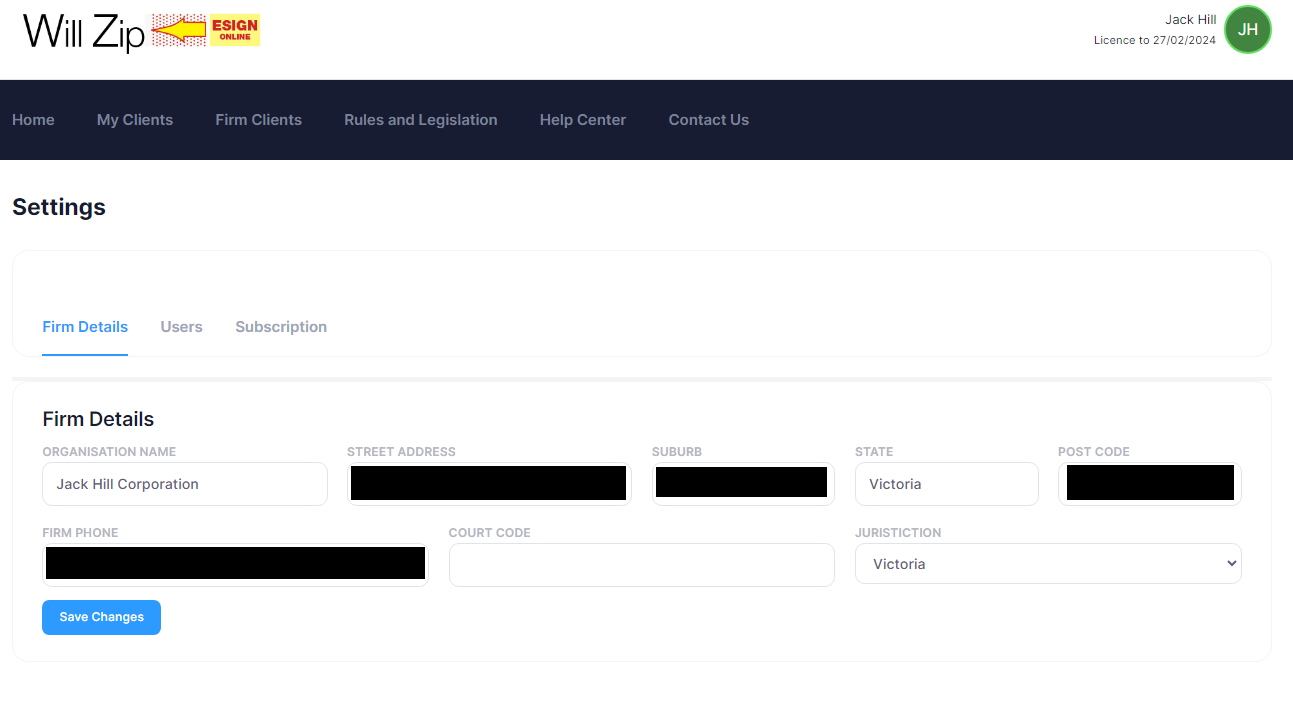
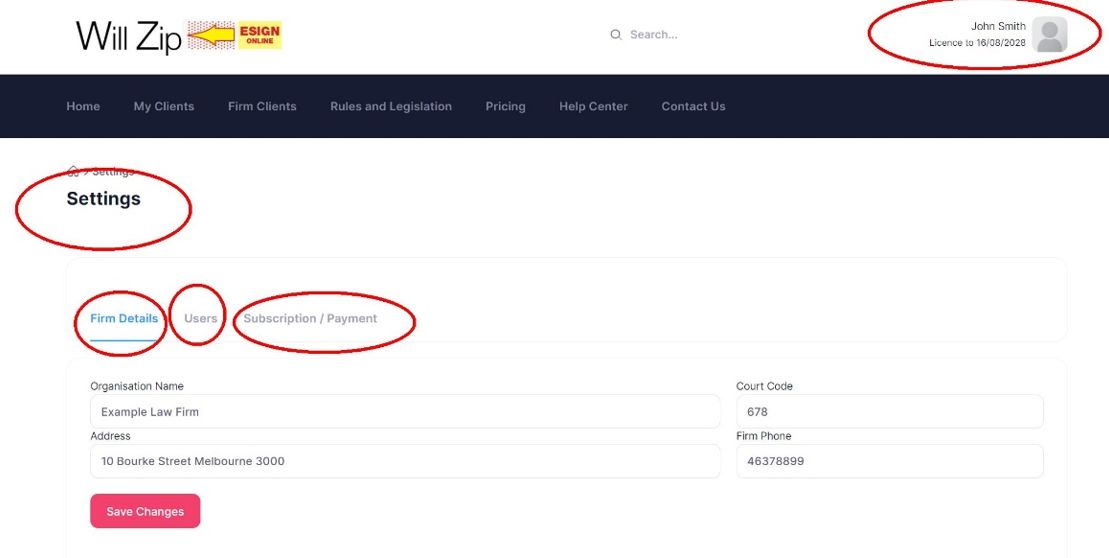
While in “Firm Details”, you can edit information about the firm. To save changes, click “Save Changes”.
Managing User Controlling Rights
As Manager you can enable other Users and also nominate anyone to also have Management rights.
As Manager you can unlock a client’s will document if access by any other Users in the firm was restricted by the Restrict Access function button.
As Manager you can see who has logged into a client’s will account and documents, which may be useful for security if any client documents was set with the restricted access function, for whatever internal reasons determined.
To Log in to your account access
Log in as the Managing User of the firm. Go to your profile icon in the top-right and click “Account Settings”.
Review Users
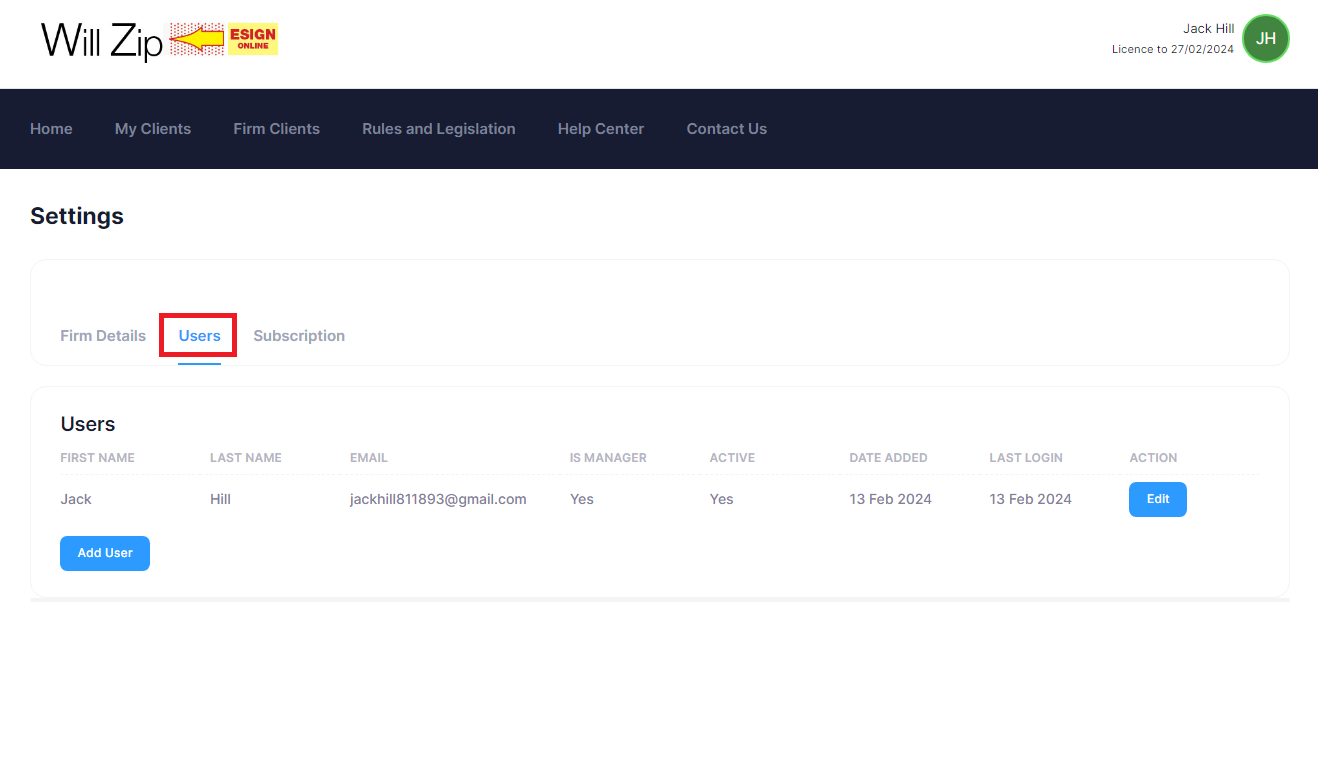
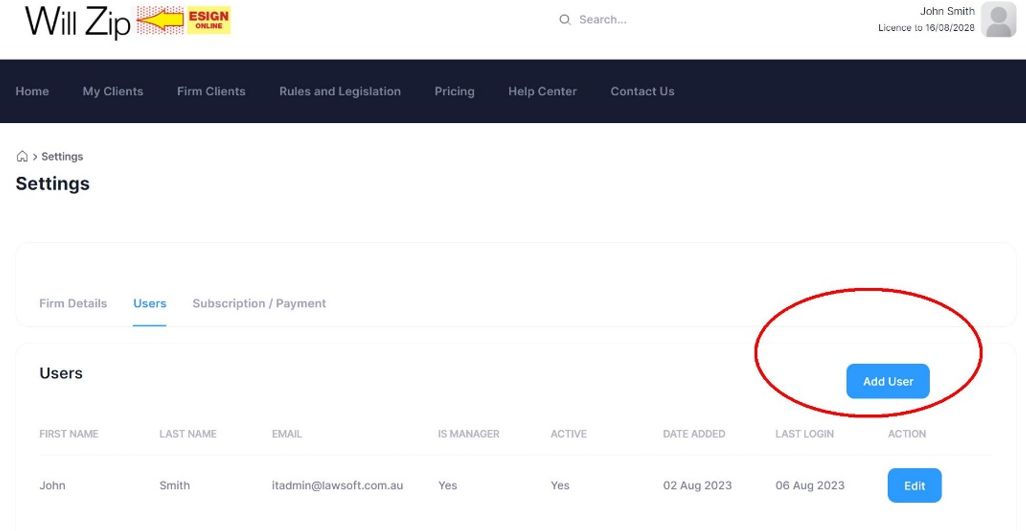
Click on the sub-heading “Users”. You can see all the users registered to your firm. To enable and edit Users click “Add User” or “Edit” if already a User on the row the User is detailed on. See below

Enable or Remove Users
As Managing User of the firm go to “Account Settings”. Hover over the profile icon on top right of the screen.
Once on the “Settings” page, click on the “Users” sub-heading and you will be able to view all users registered to the firm.
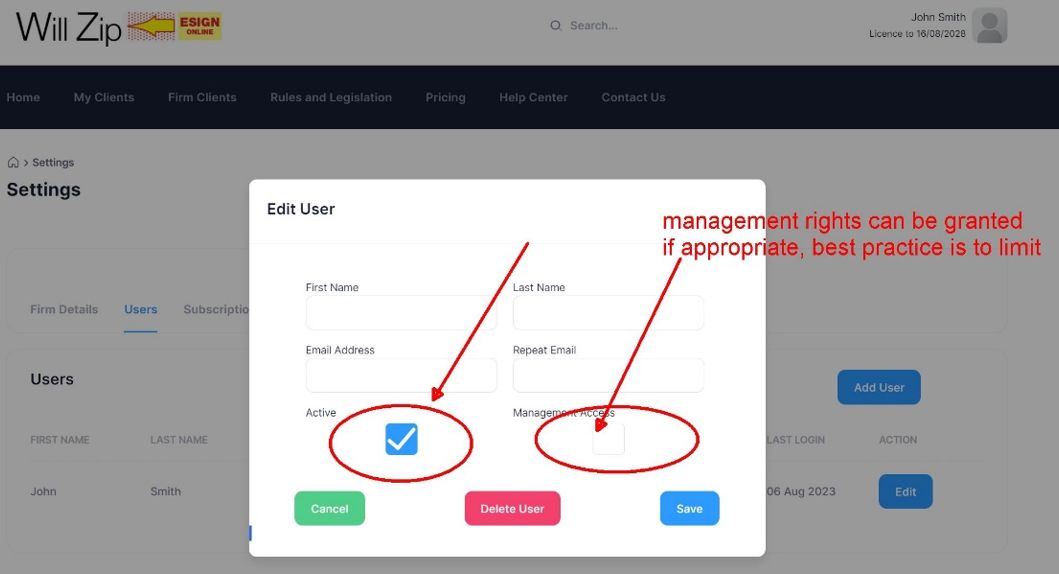
To add a new User to the account click “Add User” at the bottom of the user list.

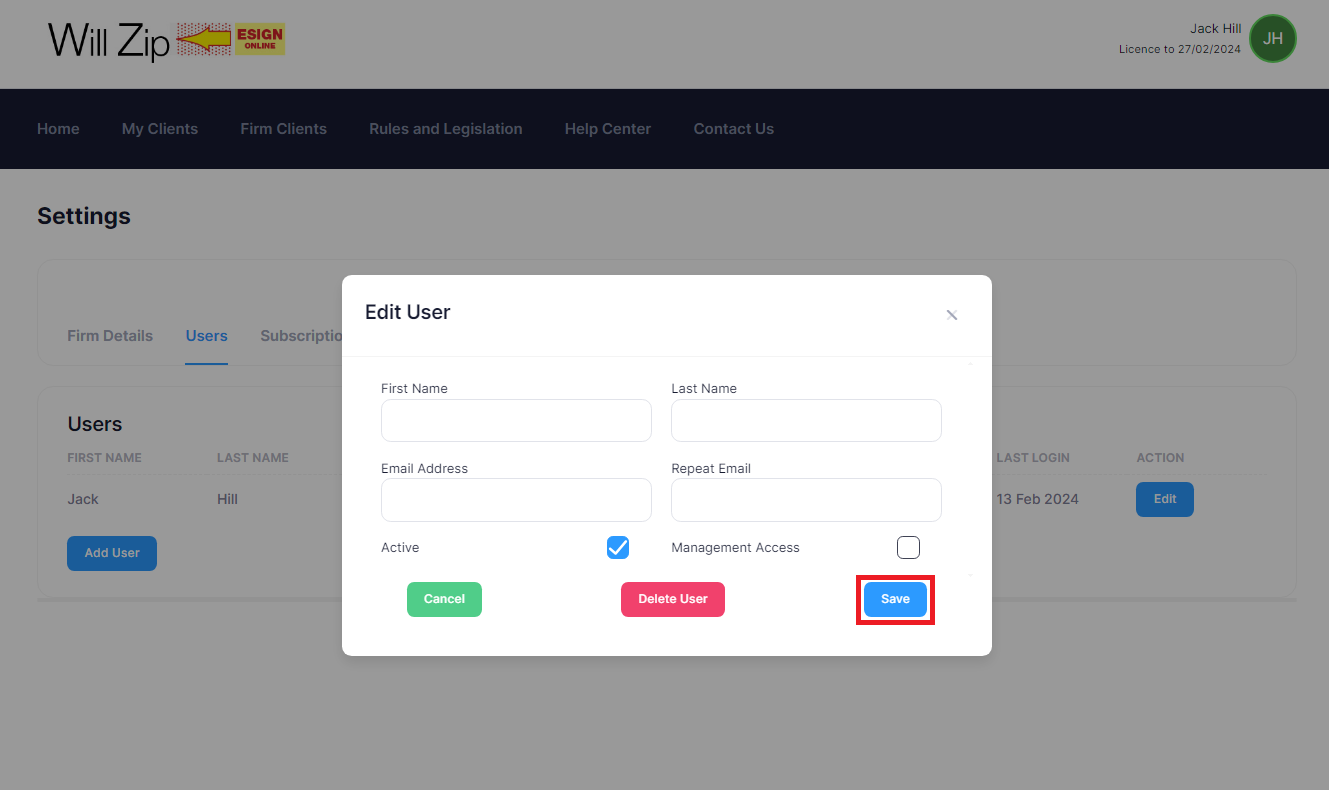
Complete the User’s required details. If you want the User to be active, leave “Active” ticked.
If you also want the User to have Management access to the firm account too then tick “Management Access”.
Once you have entered the user’s details, click “Save”.
An email is automatically sent to the new User advising them they can access the system and asking them to create the password for their account access.
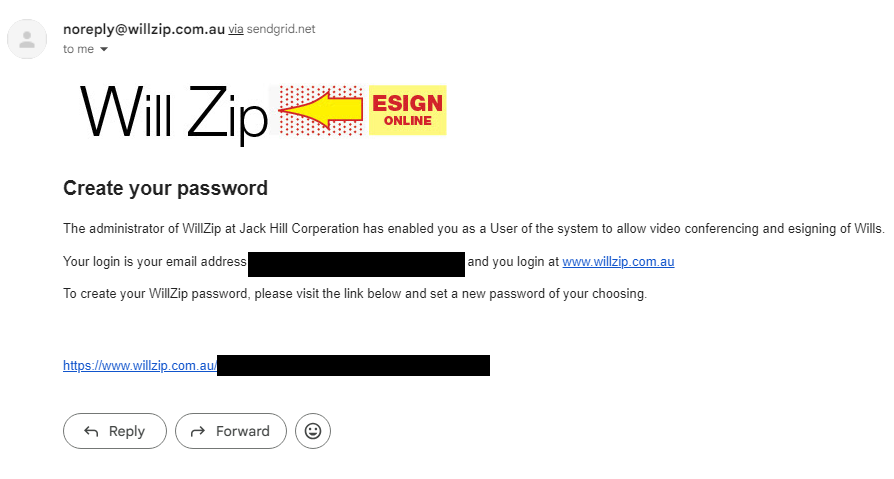
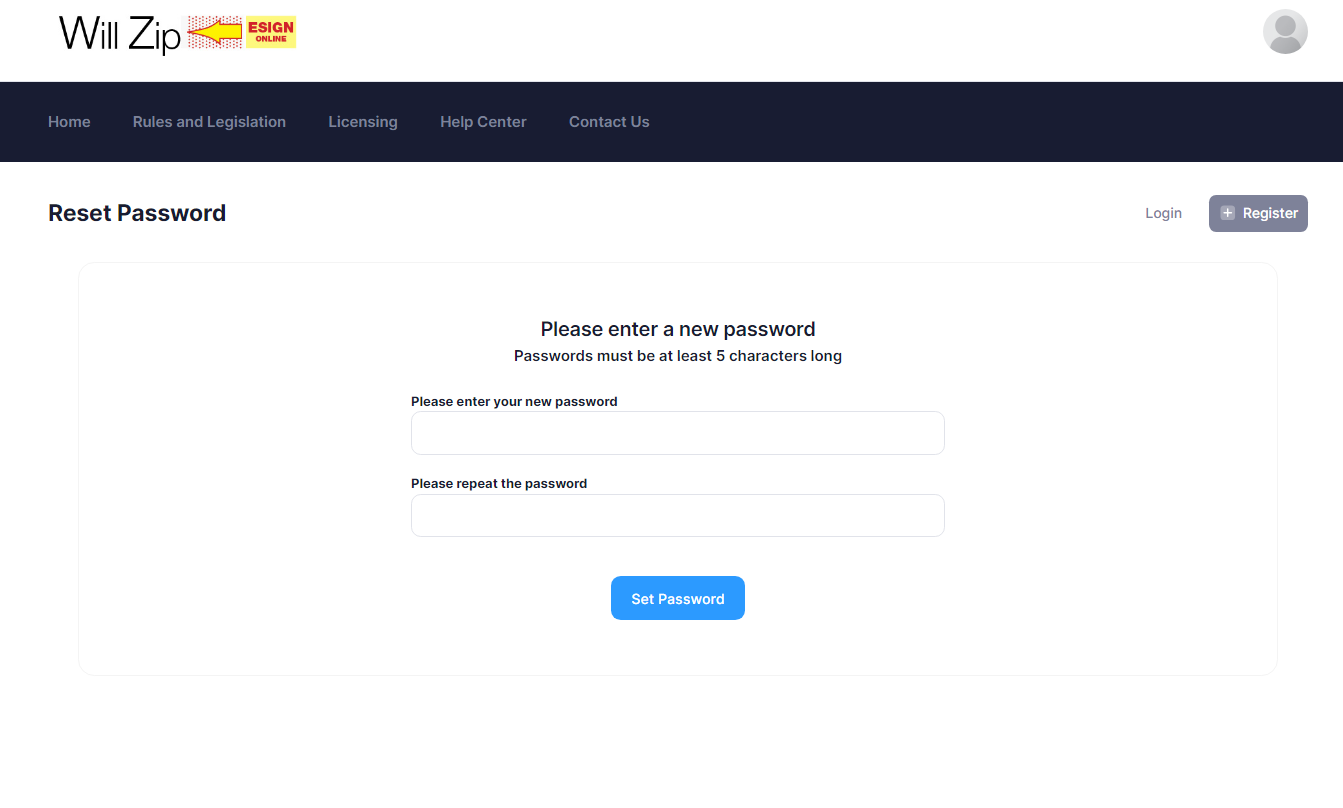
Once the User has clicked on the link, they will be directed to our site online and asked to create a password for their account. After creating their personal password and confirming “Set Password”, the newly created User can now log in to their account using their email as login and entering their password.
To unlock Restricted Access to a Client
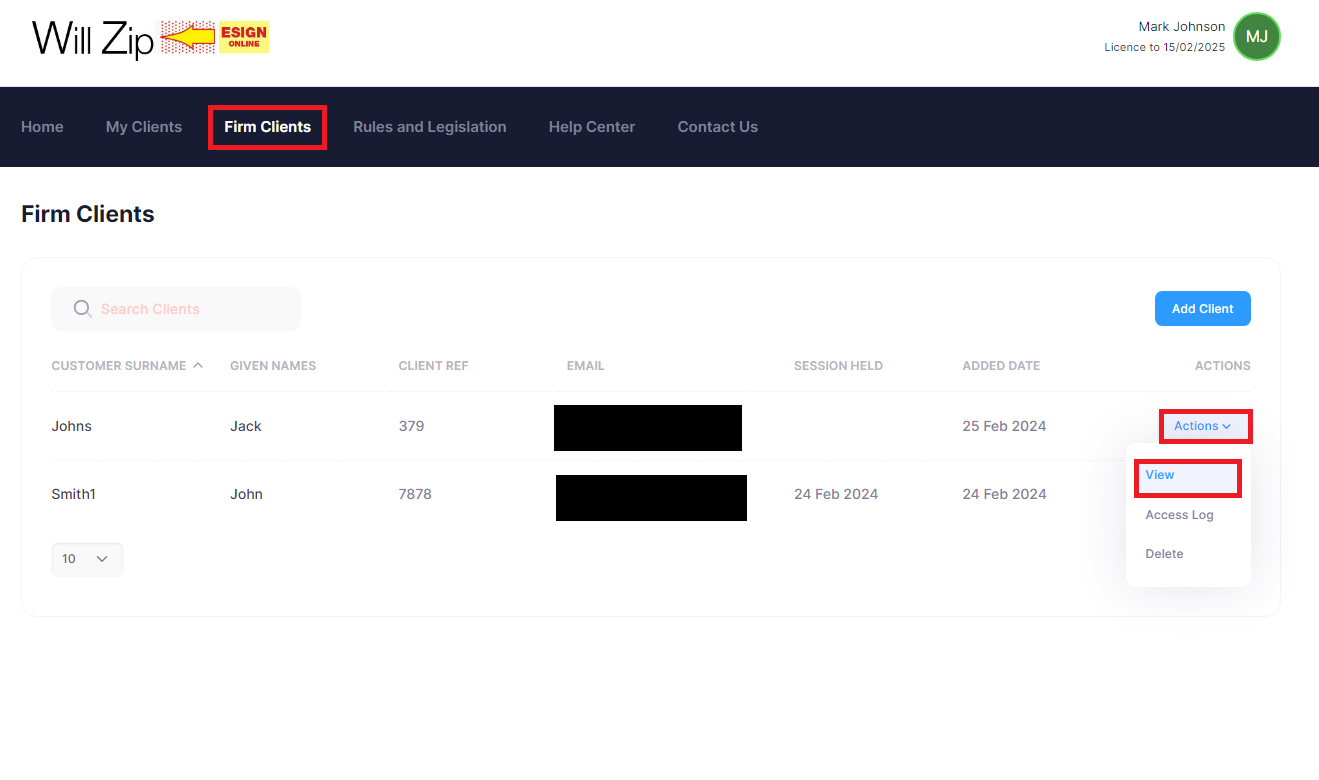
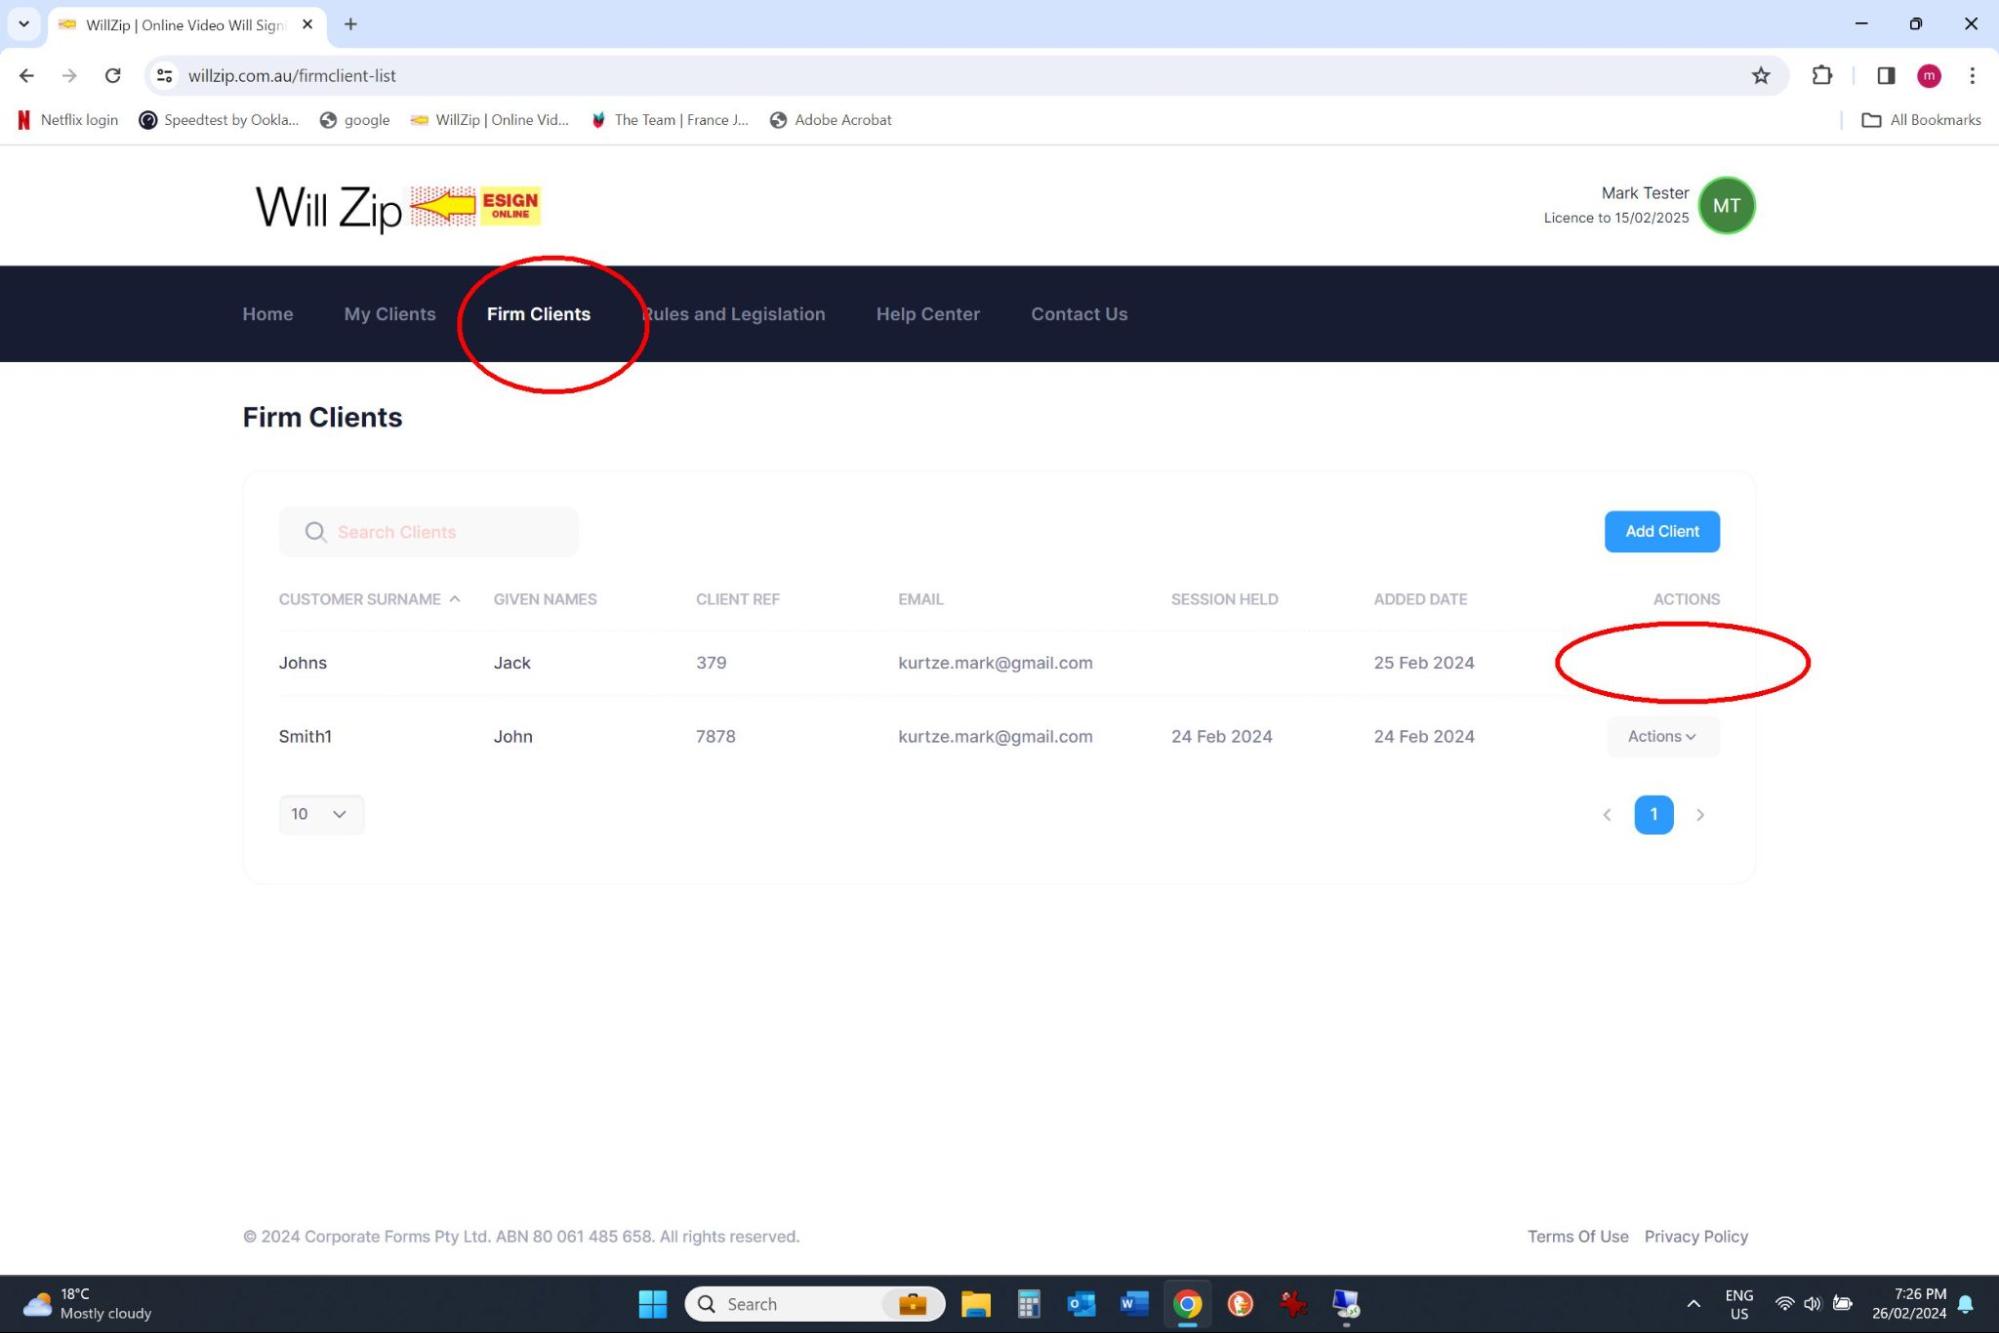
As a firm manager, you can unlock restricted access to a client. Click “Firm Clients”, select the client you want to restrict and then click “Action” and select “View”.
As a manager, you can unlock the restricted button in “Client Details” and you will be prompted to use your access code for willzip, which will be the same code your password login.
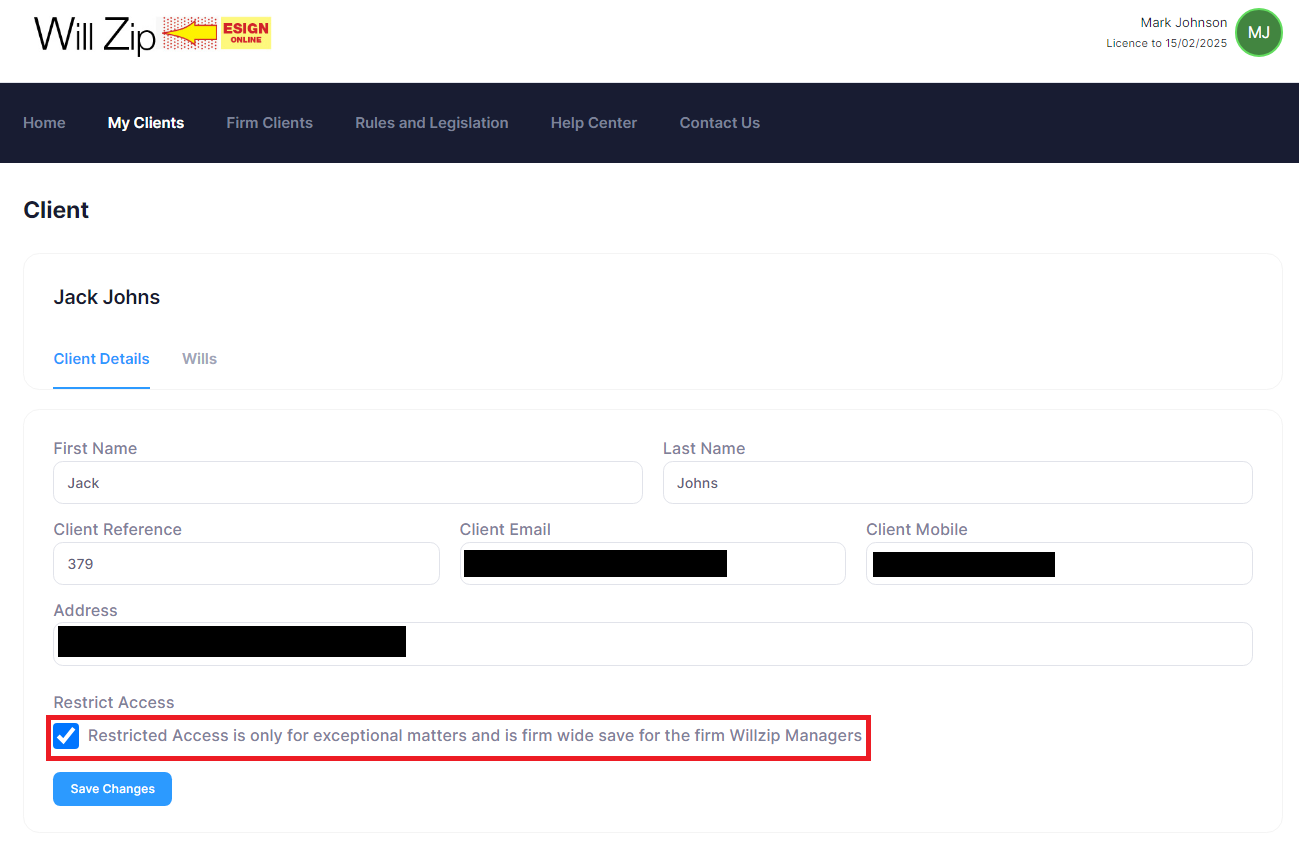
To verify the change, click “Save Changes”

As Manager - See which Users are Accessing Firm Clients
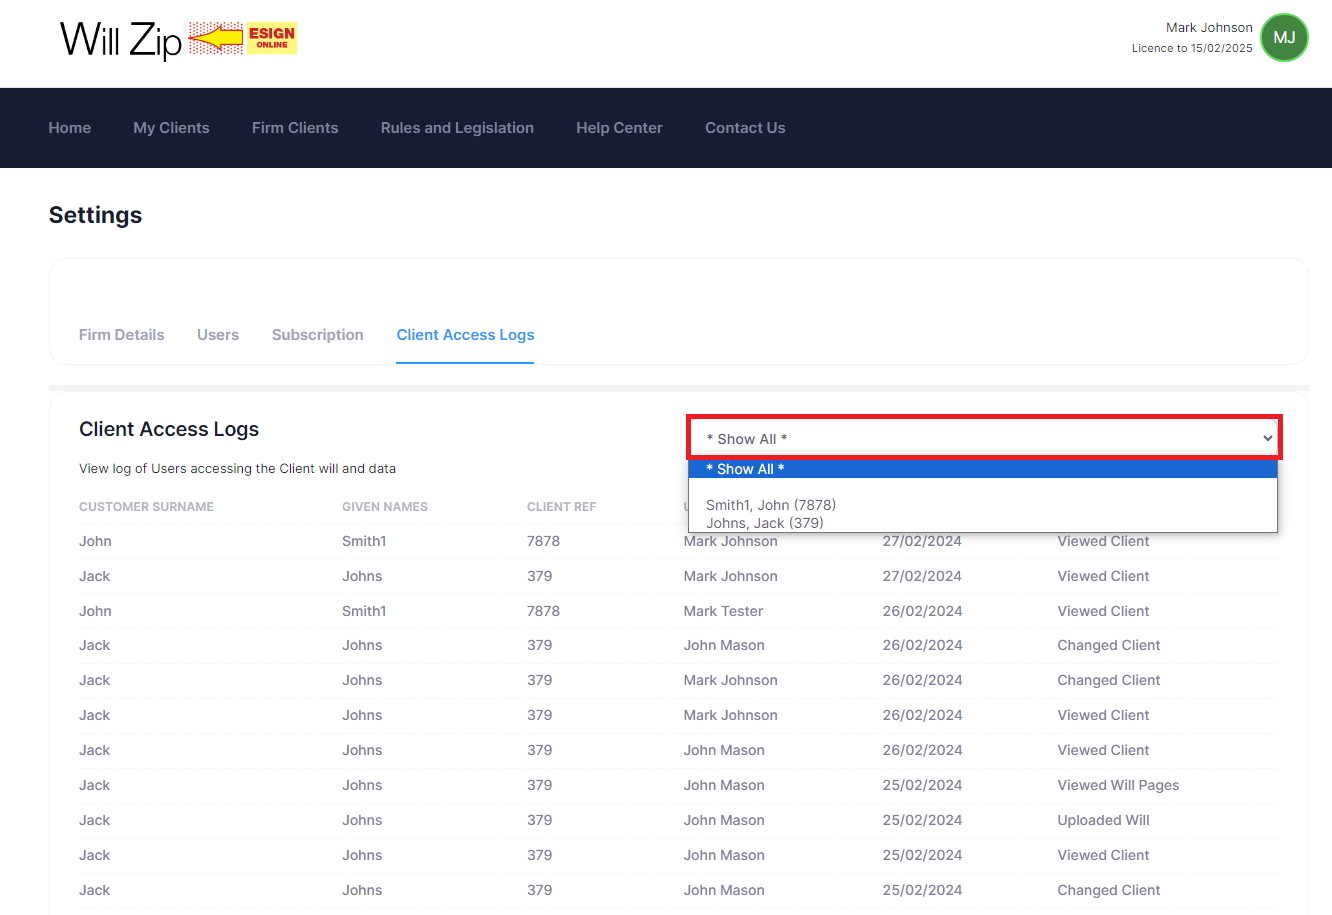
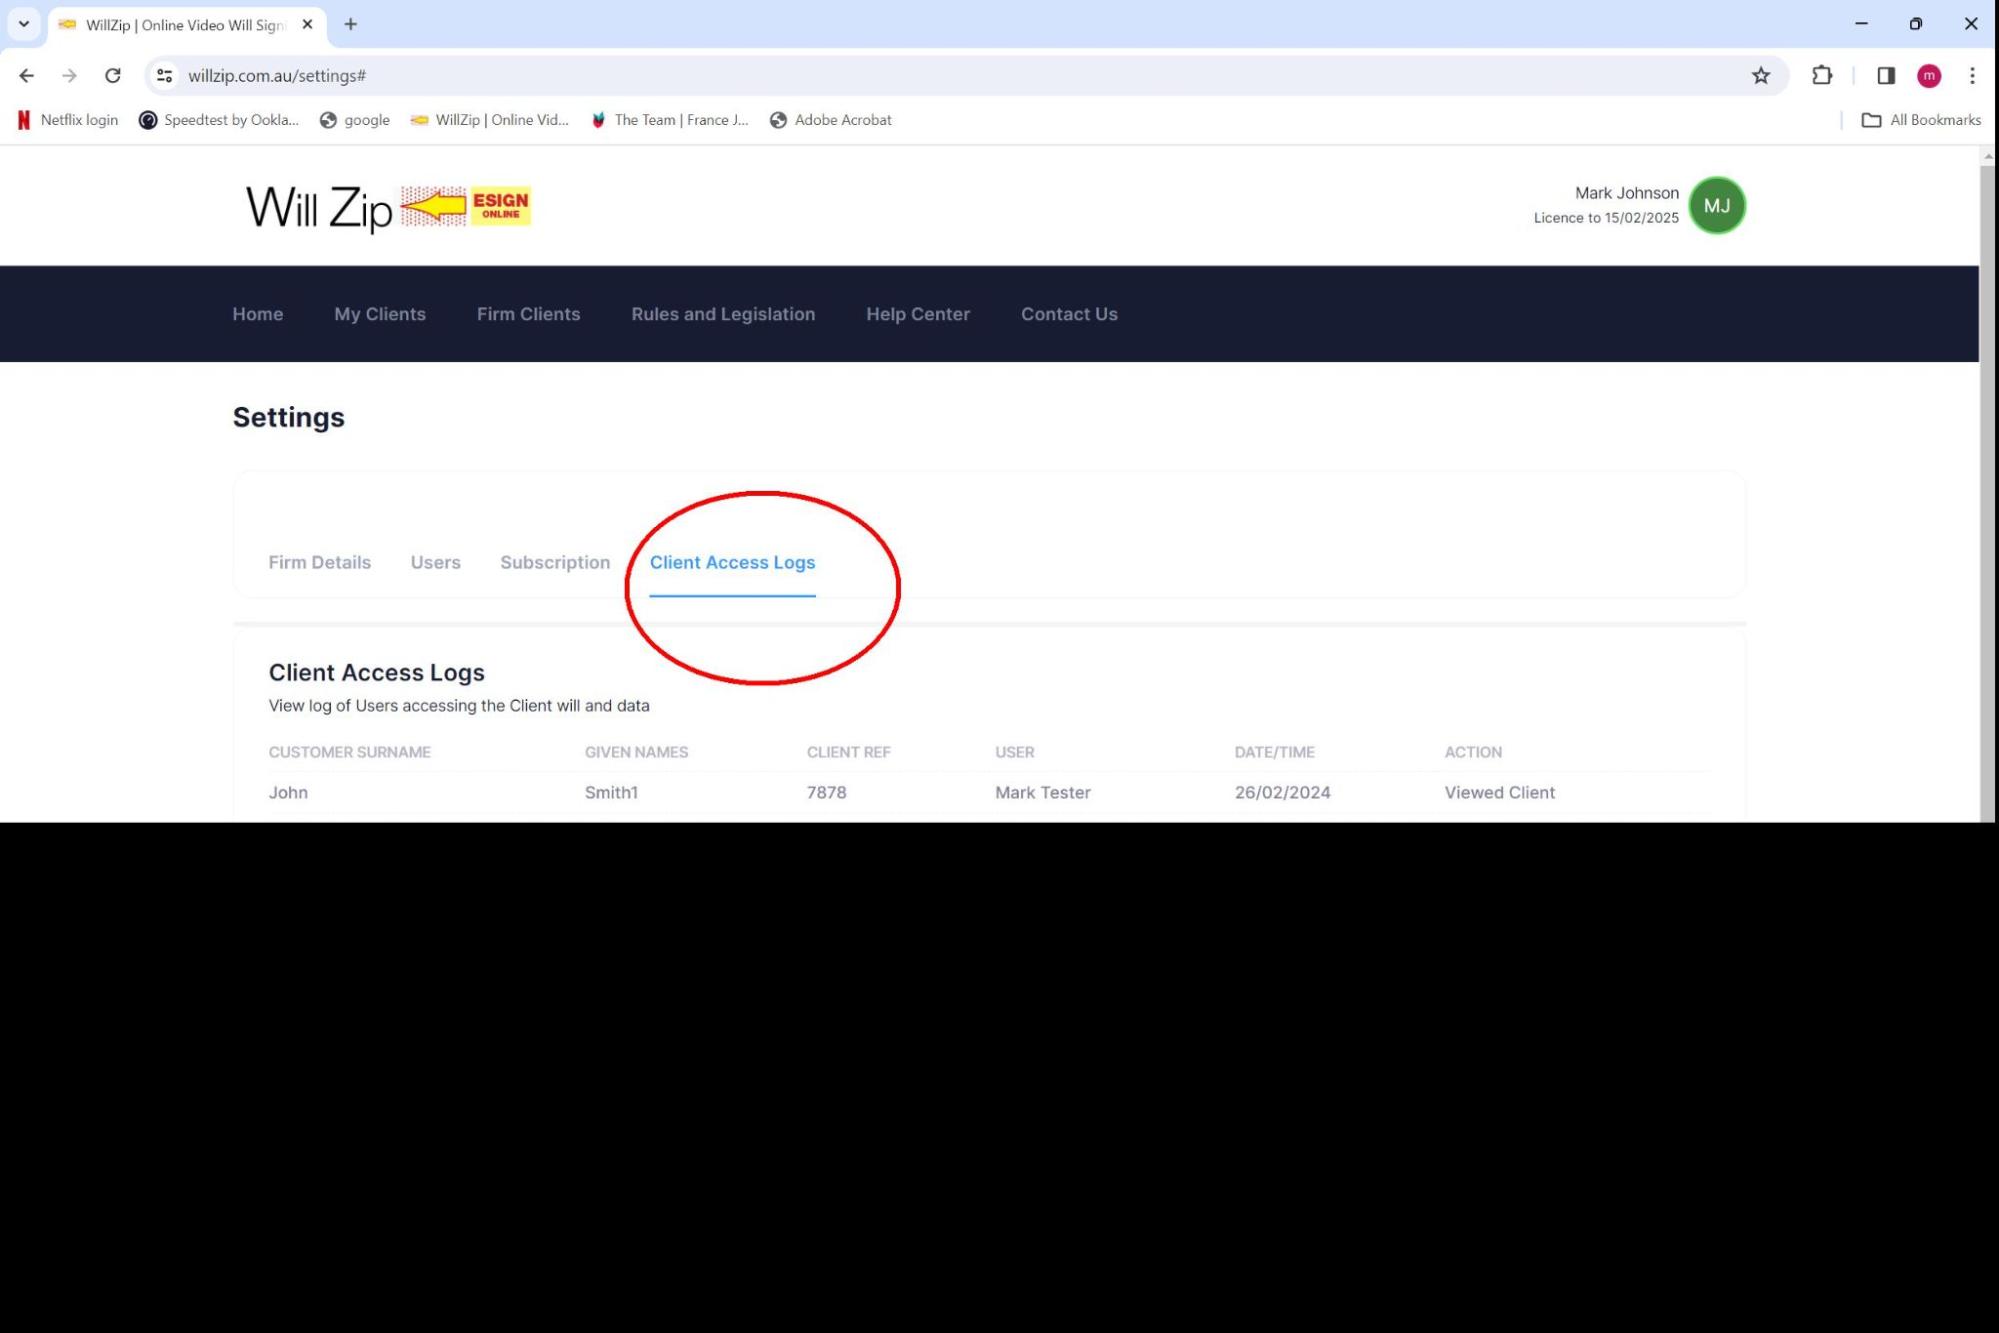
Click “Account Settings” and go to the heading “Client Access Log”.
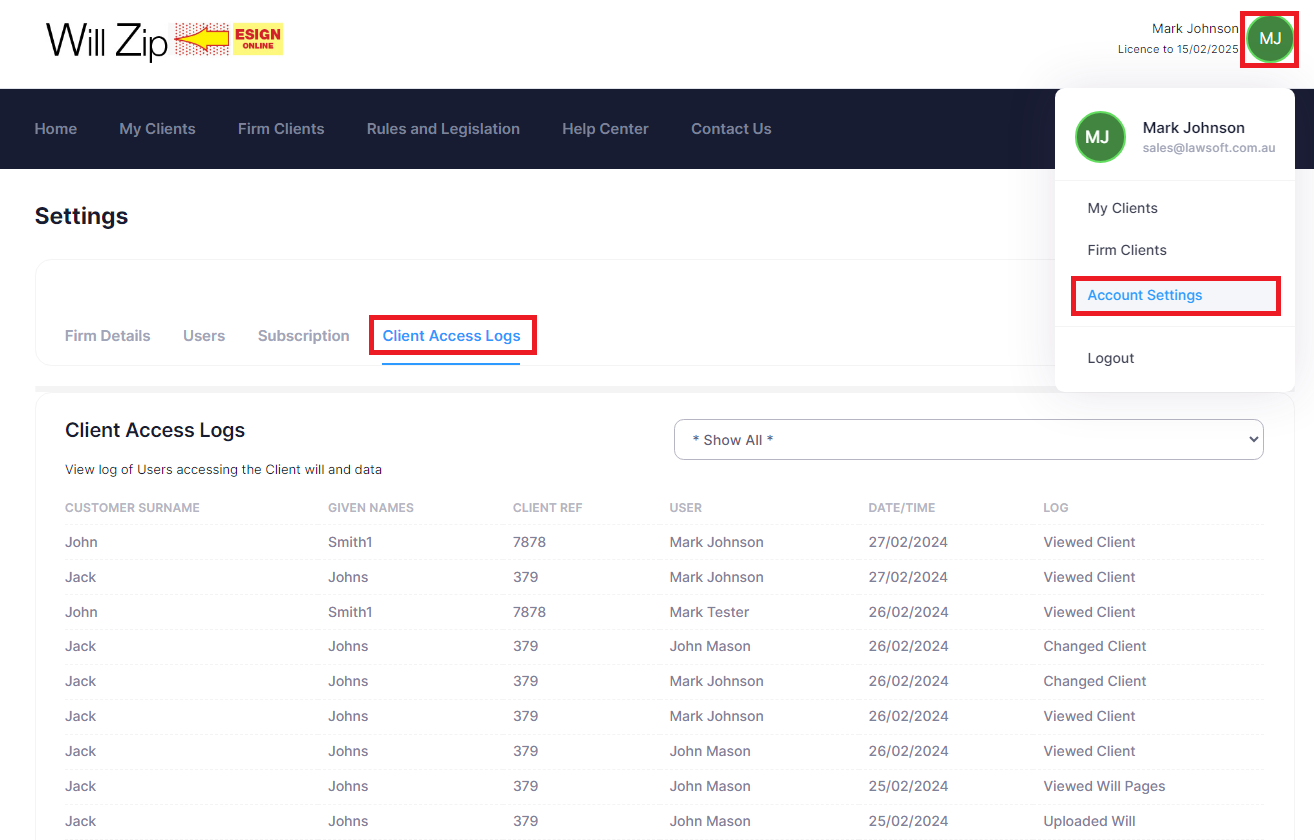
To look for a specific client, you can click on the drop-down menu and select the client directly.
Subscriptions by Use or Annually
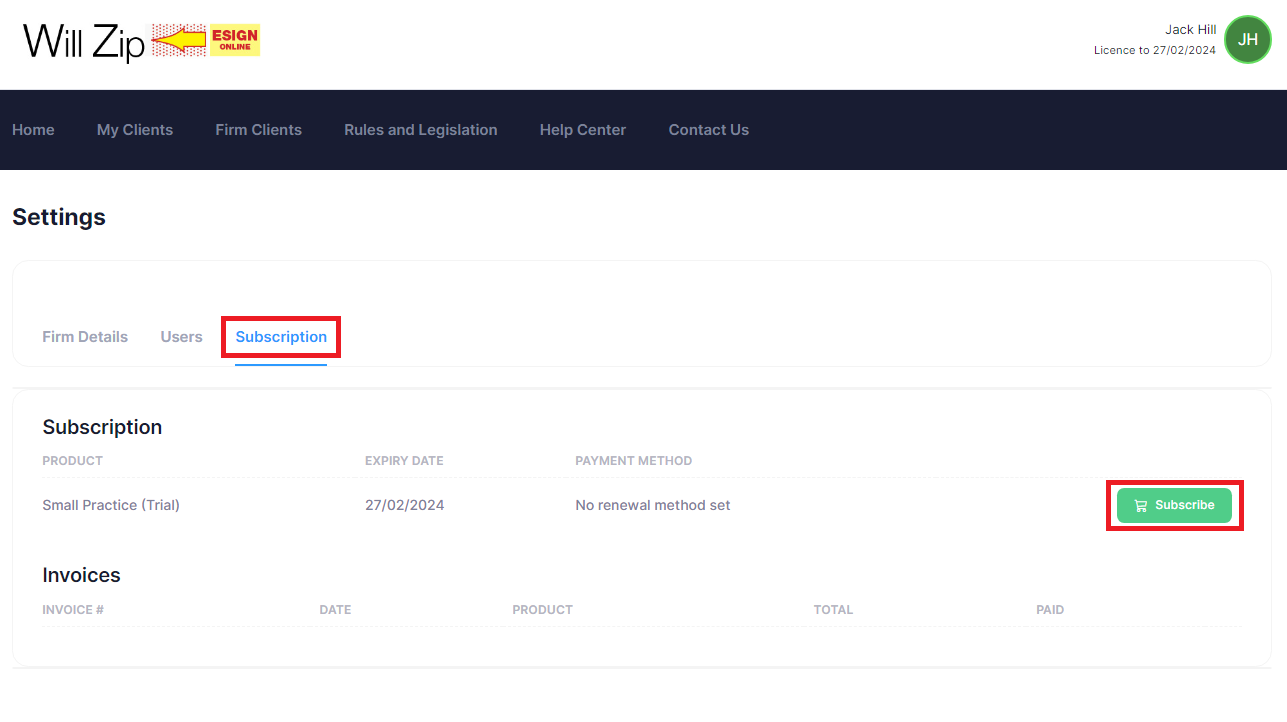
Go to your profile icon in the top-right of the page and click on “Account Settings”.
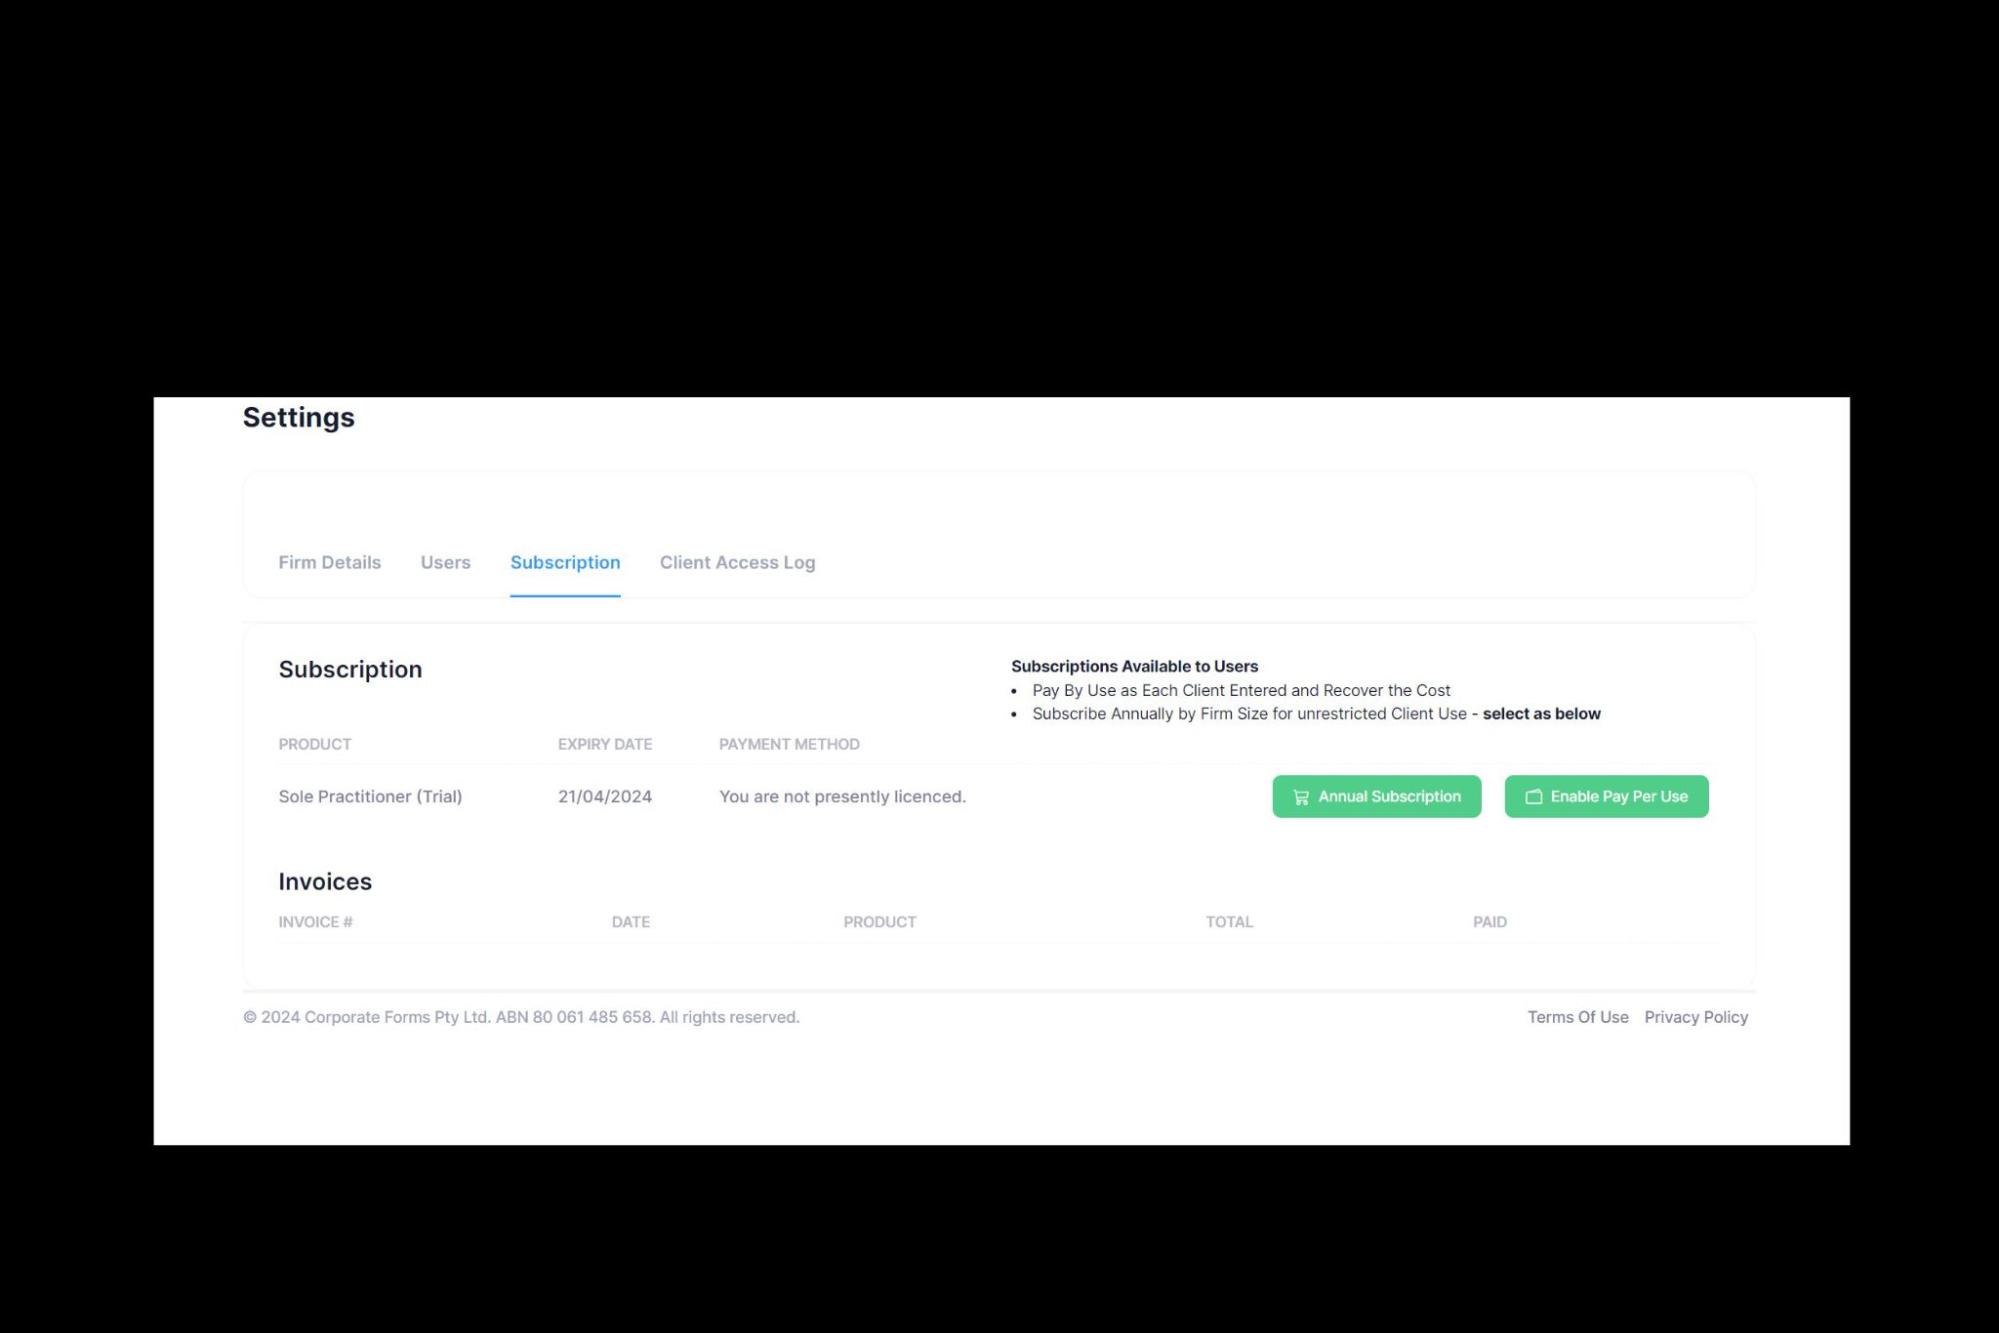
Click on the tab “Subscription” and then click the “Subscribe” button. You will be presented with 2 Options
- to Subscribe Annually or
- to pay by Use by each Client registered, allowing full access for each Client
Pay By Use Option
If electing to pay by Use simply follow the prompts and register a credit card and when you register a Client you will be prompted to confirm payment.
Again an Invoice will be sent marked paid as registering a Client by Subscription is by credit card only. The invoices as they arise will also appear in your Subscriptions page to also download later as you may wish to.
If choosing Annual Subscription then follow the prompts after clicking the Annual Subscription as below
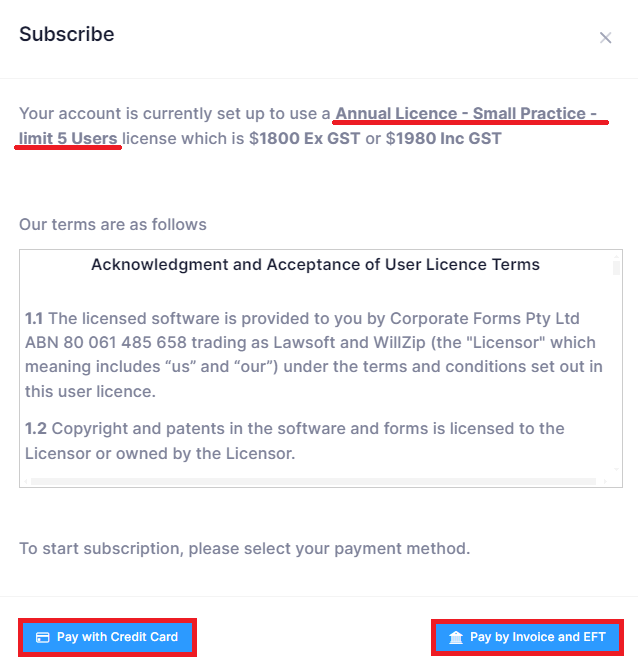
In the example attached below this firm is registered as a “Small Practice” the annual licence is detailed on the screen and licences up to 5 Users for this subscription.
On acknowledging the Terms, choose your payment method, select either
Pay with Credit Card
or
Pay by Invoice and EFT
If you select “Pay with Credit Card”, you will then need to enter your credit card information and proceed with “Pay Now”

The page will later display the “expiry date” for your subscription and the last numbers only of credit card that can be linked to the firm for future use if desired.
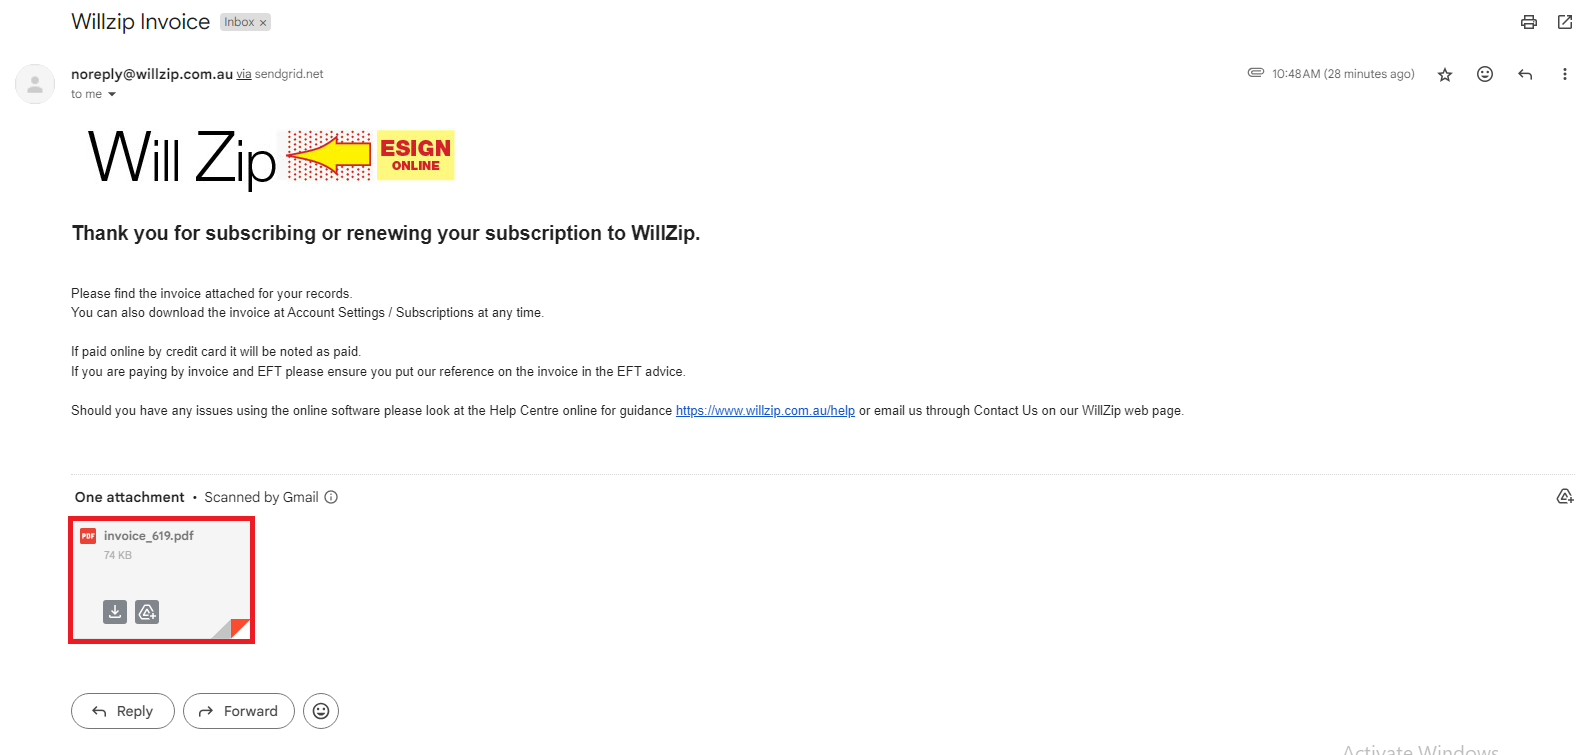
If you proceed with the credit card option then the invoice is created and paid via the card and an email automatically sent to you with payment confirmation.
Please always check in your JUNK folder for any emails if not received.
The invoice is also copied to your Account under your Subscription tab and can be down loaded later again if required.
Pay By Invoice and EFT
If you select “Invoice and EFT”, a pop up will show confirming your request for “Manual Invoicing”.
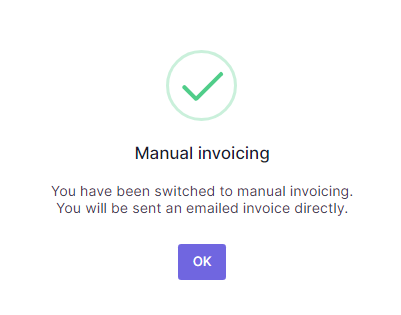
The invoice is automatically raised and emailed to you for payment and the subscription will commence from that date.
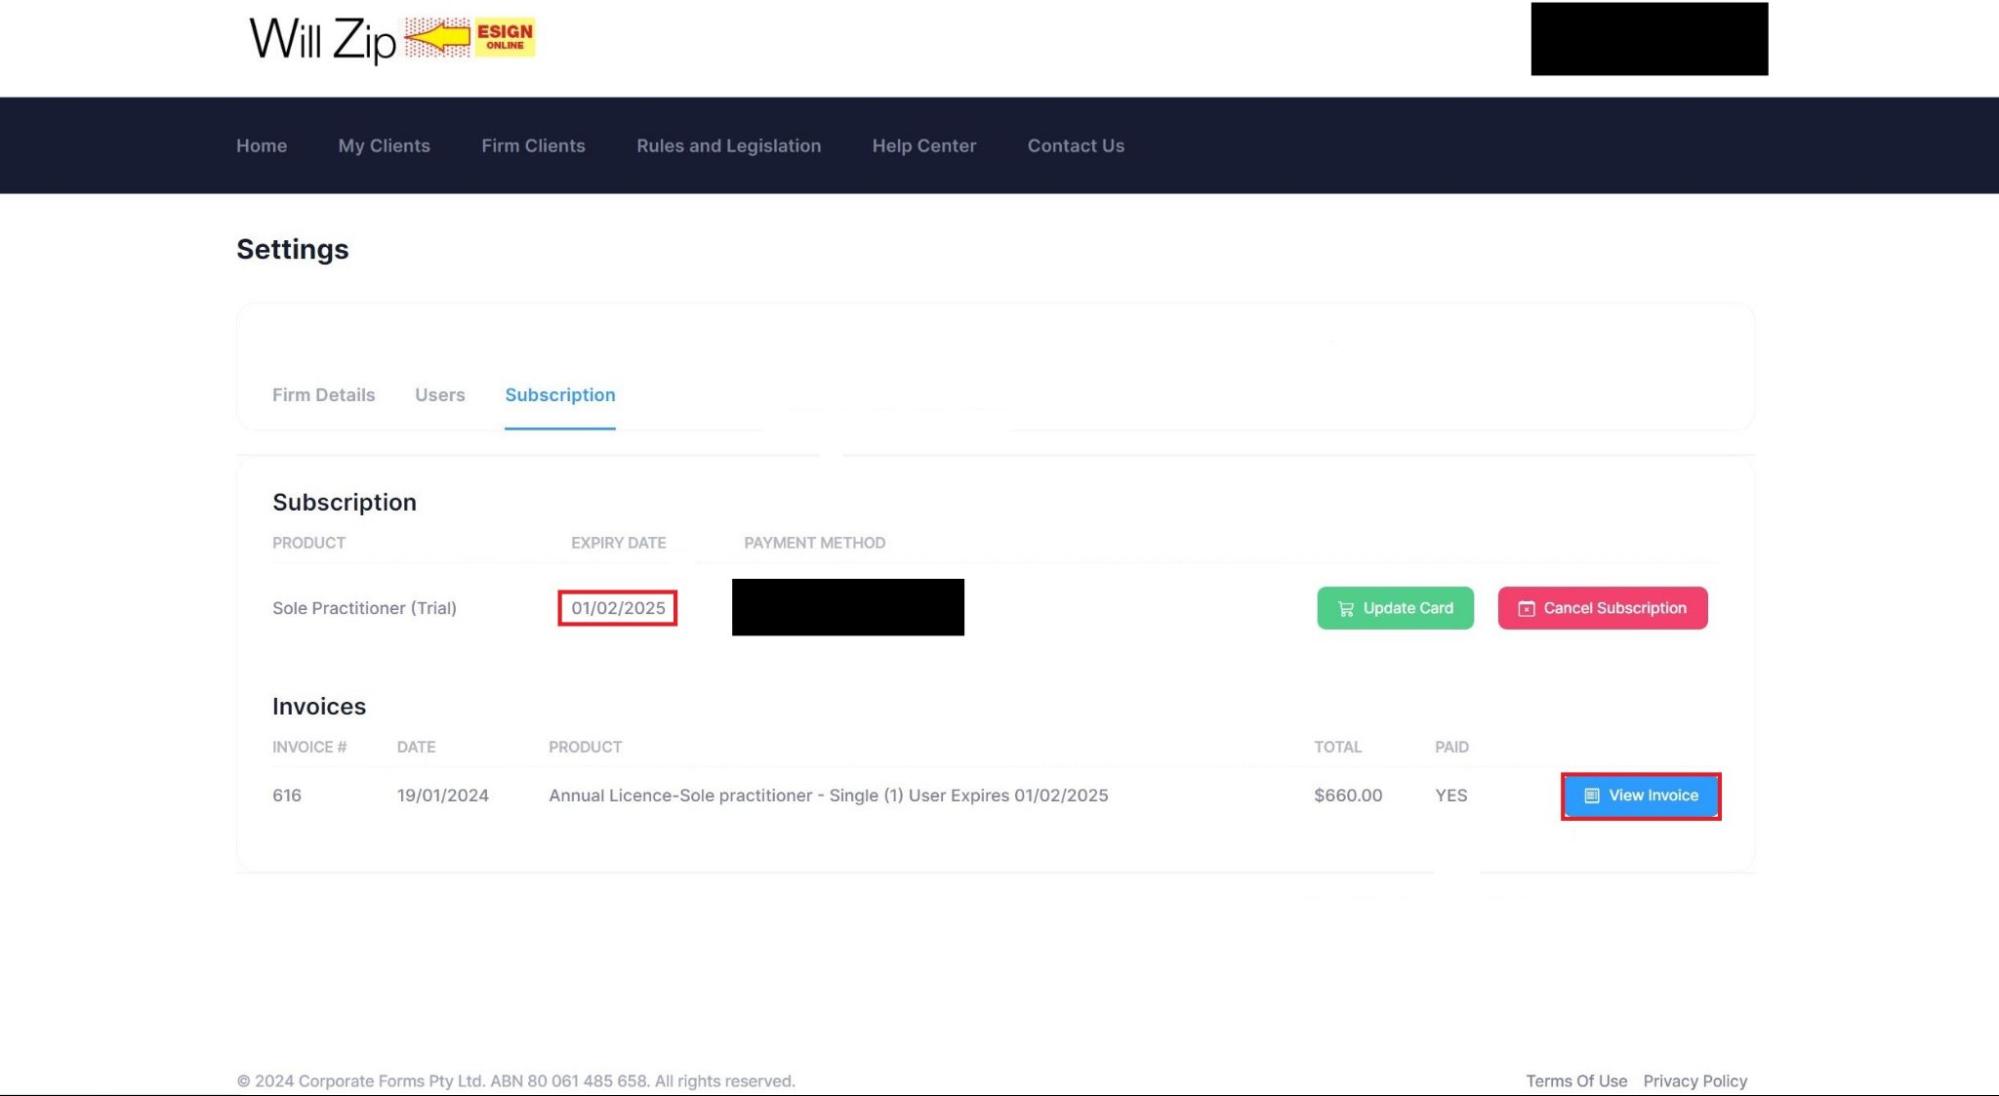
The Account page will now also display the “expiry date” for your firm subscription.
You can view and print all invoices by clicking the “View Invoice” button.
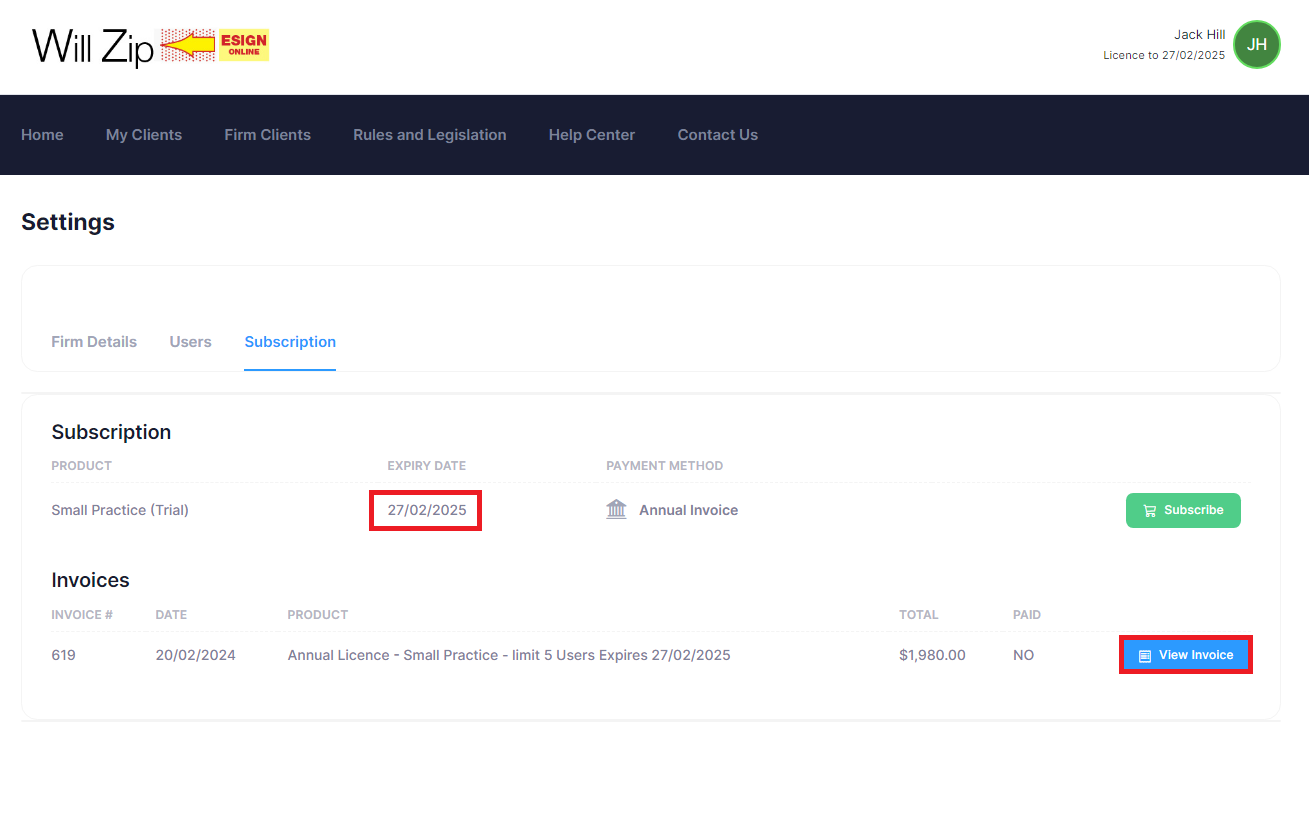
An email of the invoice will also be sent to the Manager of the firm’s email.
Setting up Your Client
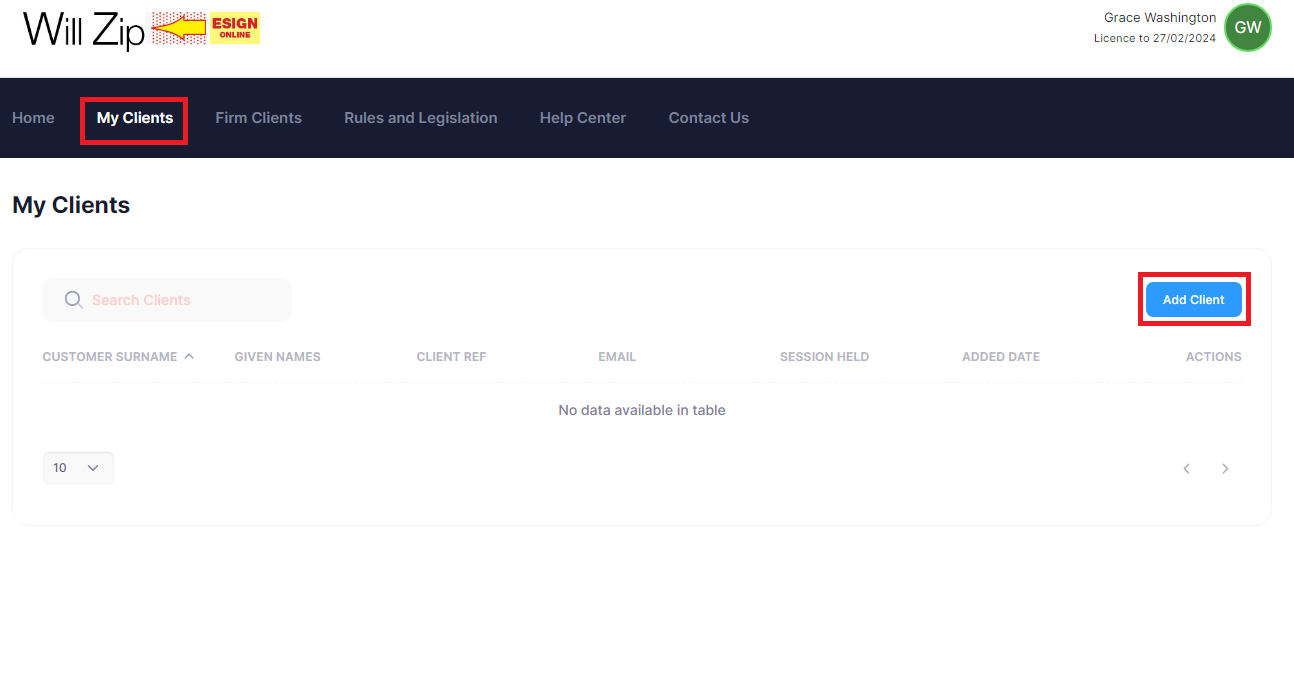
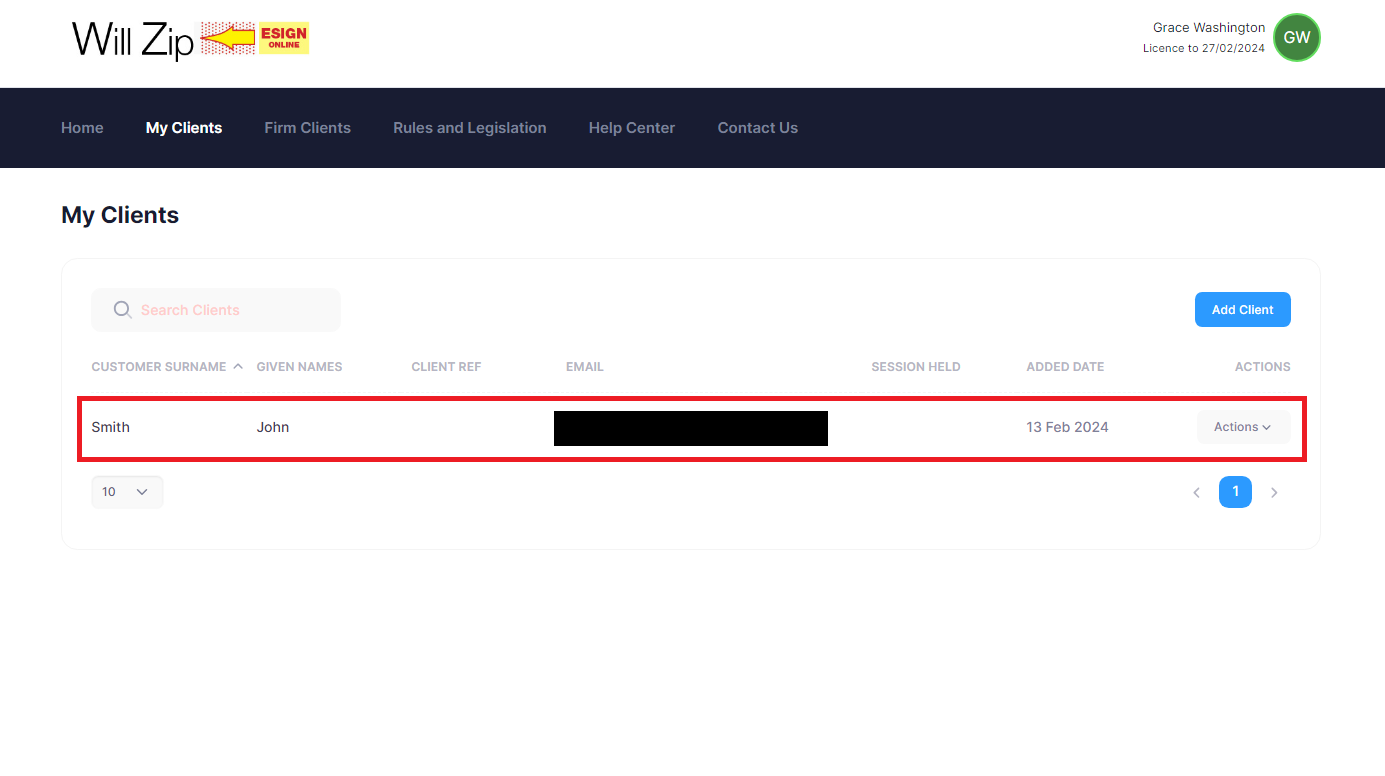
Log in and navigate to “My Clients” where My Clients are accessed
Select “Add Client” and enter your client information as required.
Once the information is completed proceed and “Save Changes”.
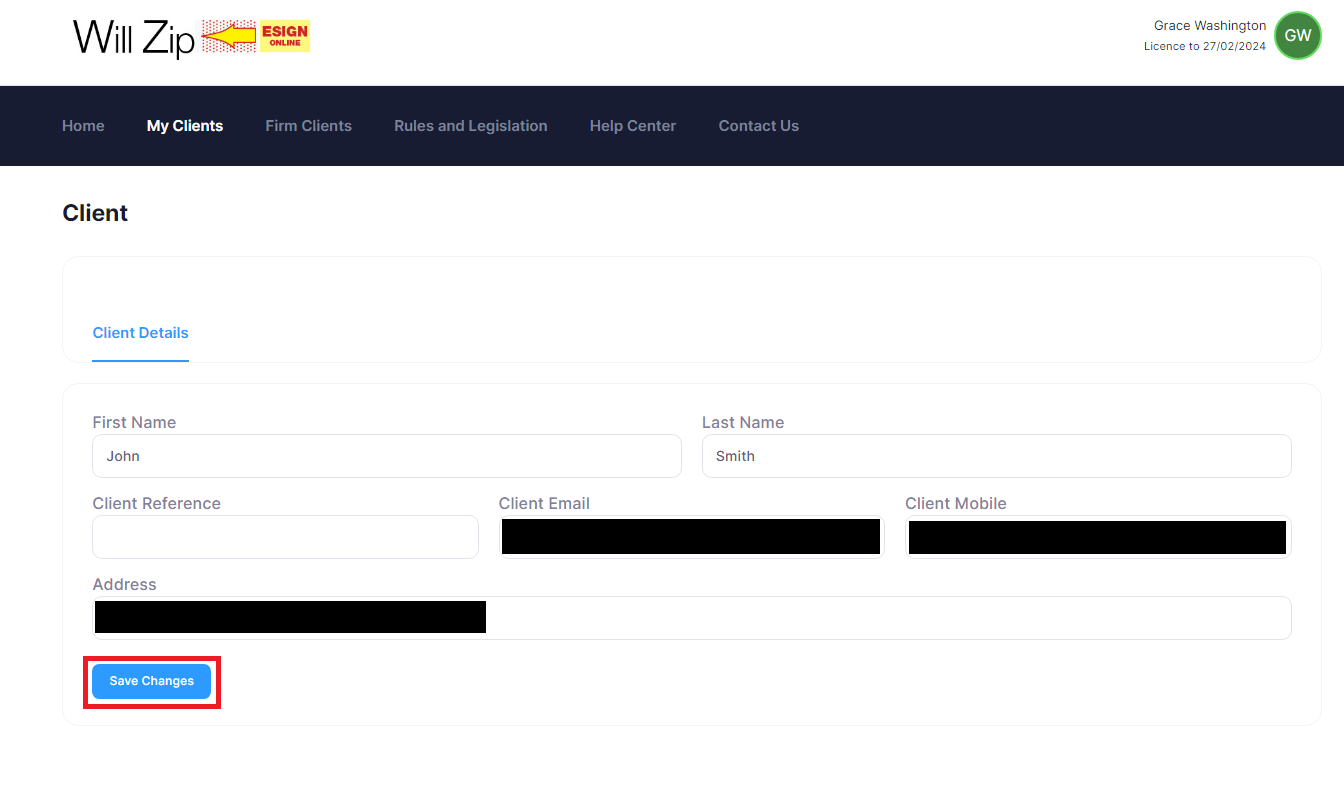
Navigating back “My Clients” will display the new client.
The will for that client can now be imported into the database once you have completed the will in discussion and on instructions from your client.
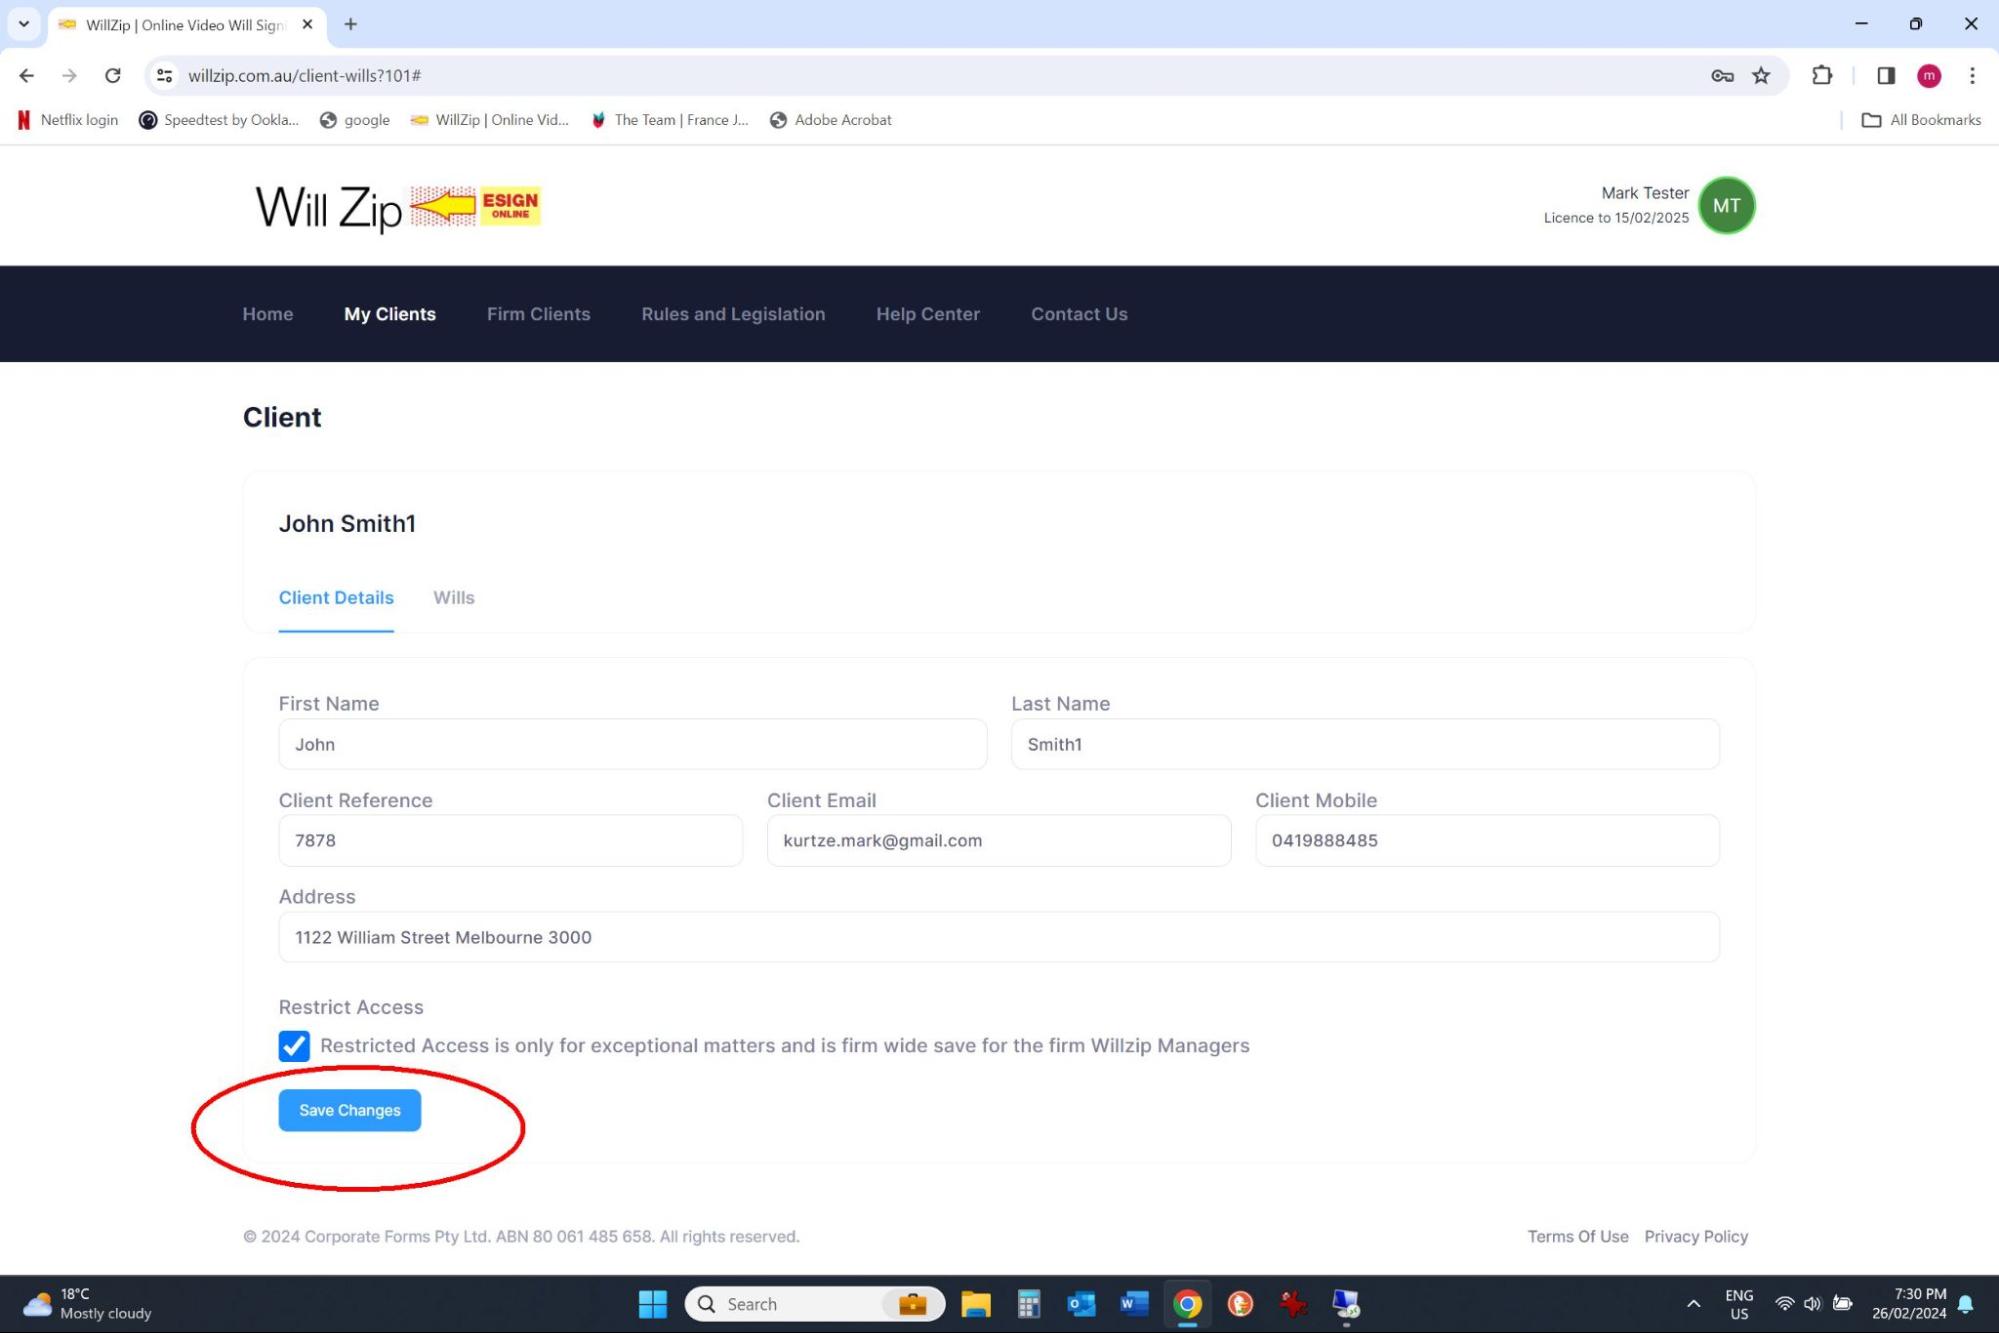
Restrict Access by other Users to Access Your Client’s Will
If desired you can restrict access to the Clients documents.
This should only be used in exceptional circumstances as it will create access issues and others in the Firm may need to assist and or action the client services with you.
The Firm software Manager can release any restrictions to access and of course you as the Client’s attending Lawyer can release the access restriction too, at any later time.
See selected button in the screen below.
You will be prompted to confirm with your willzip access code (as used to log in).
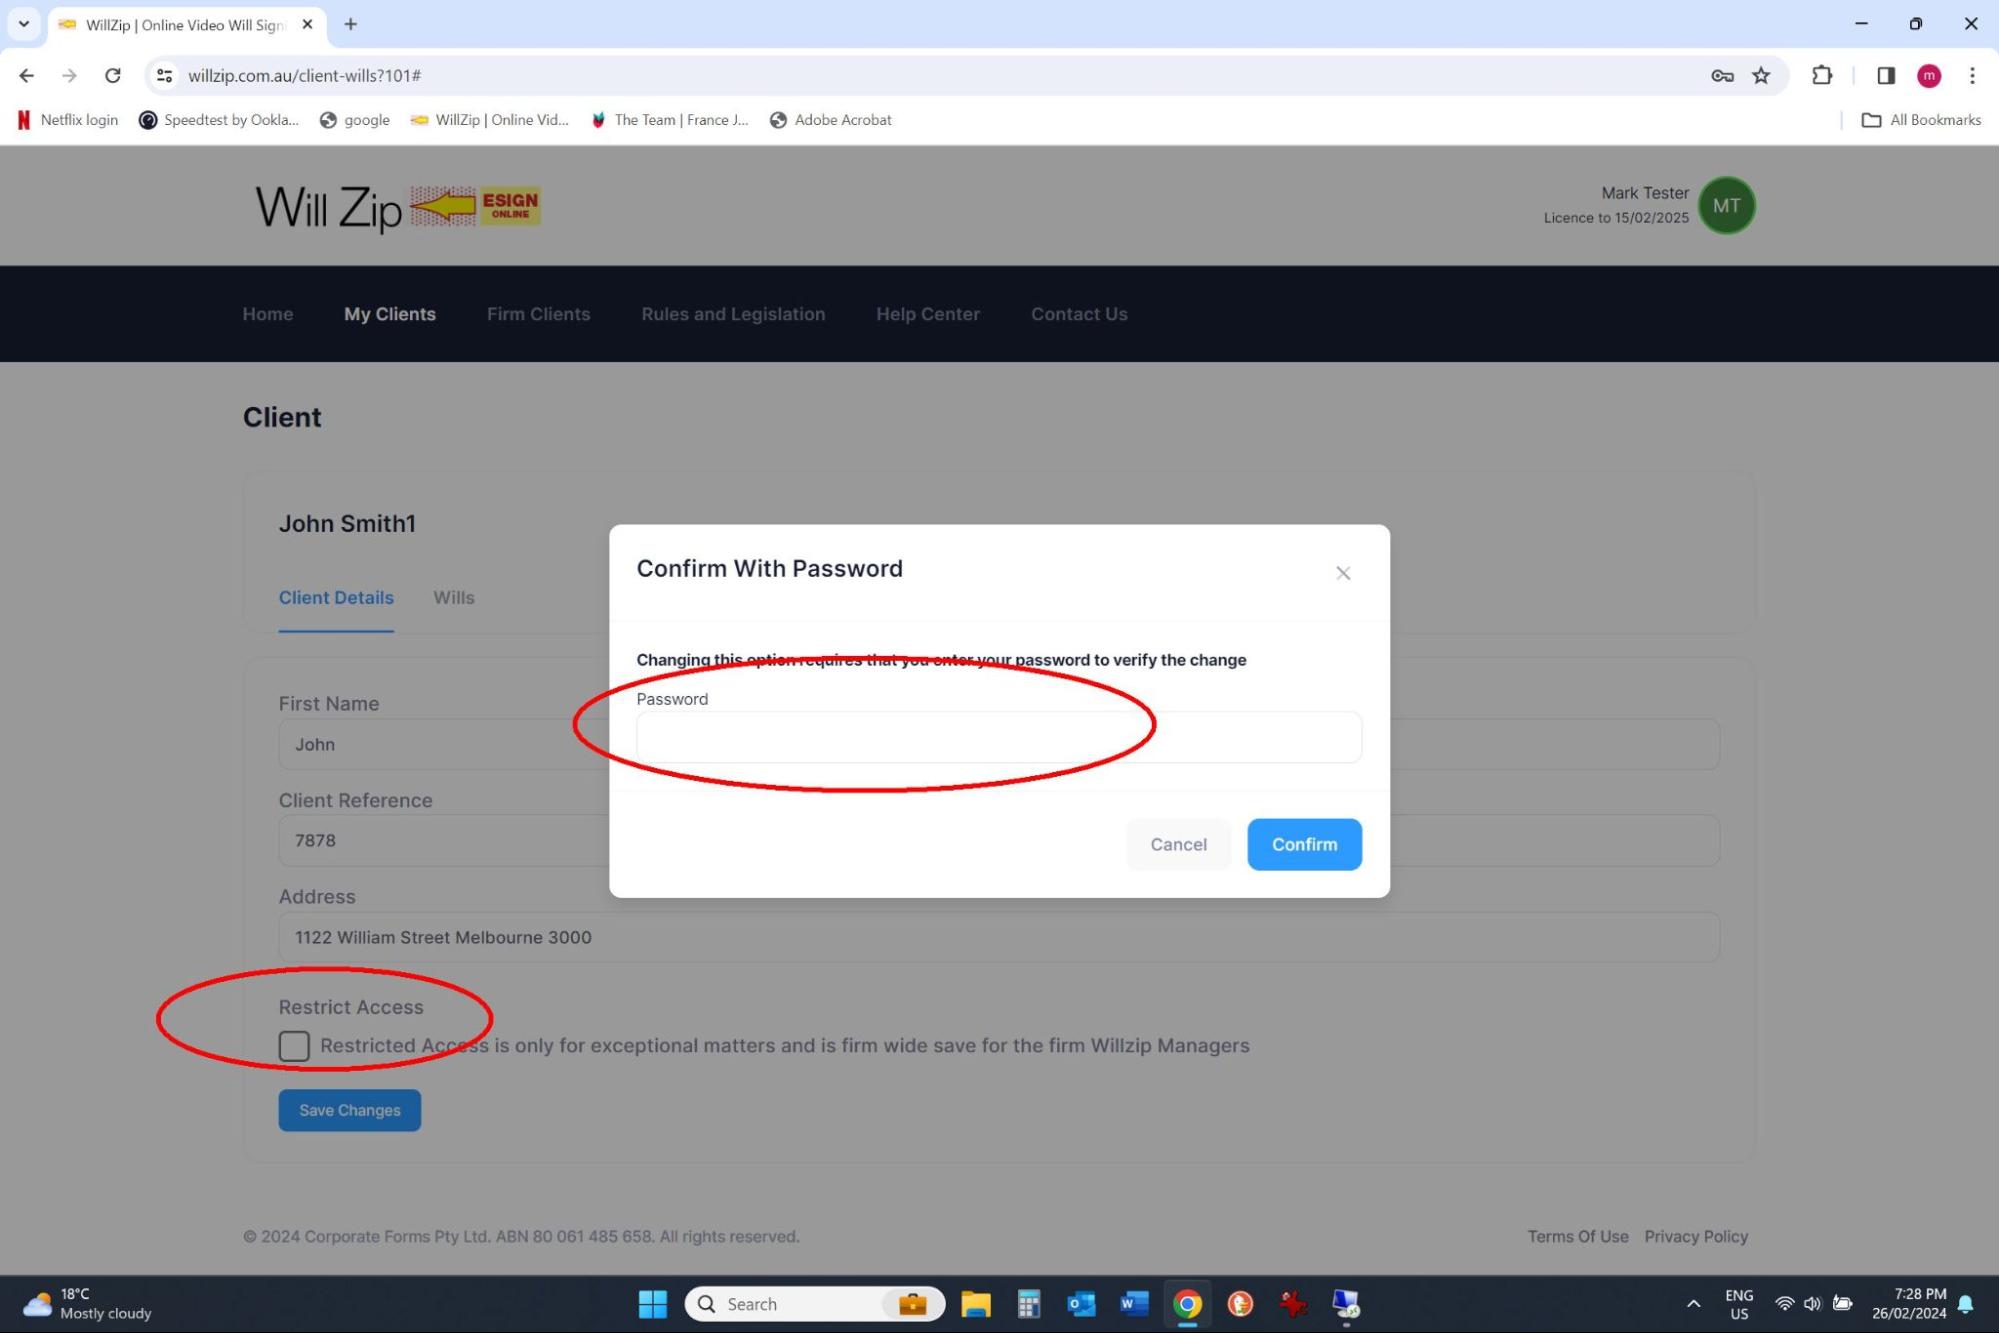
When selected, you still need to SAVE the Client changes !
Limited Access Rights when Restricted
Other Users can see that your Client is in the system but will be unable to select “View” and otherwise select download options.
Importing Your Client’s Will
Adding a Will
First Prepare your finalised will
Firstly it is important to prepare the will as a pdf.
Remove any date clauses which may normally be hand inserted if the will was signed in ink, as our system dates the signatures when electronically signed.
Further remove any occupation footers so the witnesses name and date of signing is dropped in under their signature fields see below as to how to set signing areas for all parties to the will signing
Once the Will is prepared as a PDF
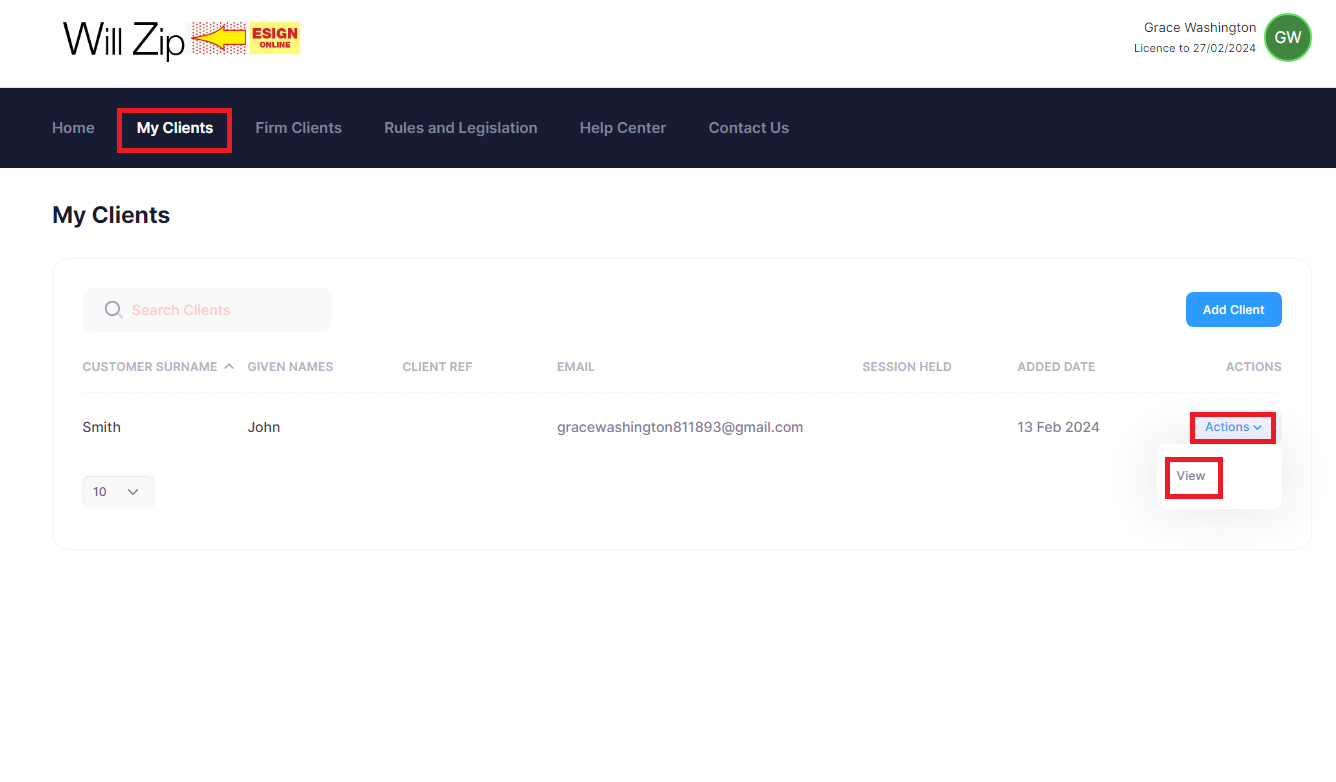
When logged in go to the “My Clients” heading.
Select the client from the client list by clicking “Action” on the right side the row select “View”.
Select the “New Will” button on the right-hand side of the client page and add a reference if not using the reference of the client from setting up the client.
Then choose the PDF version of the will you have created and upload it to the system.
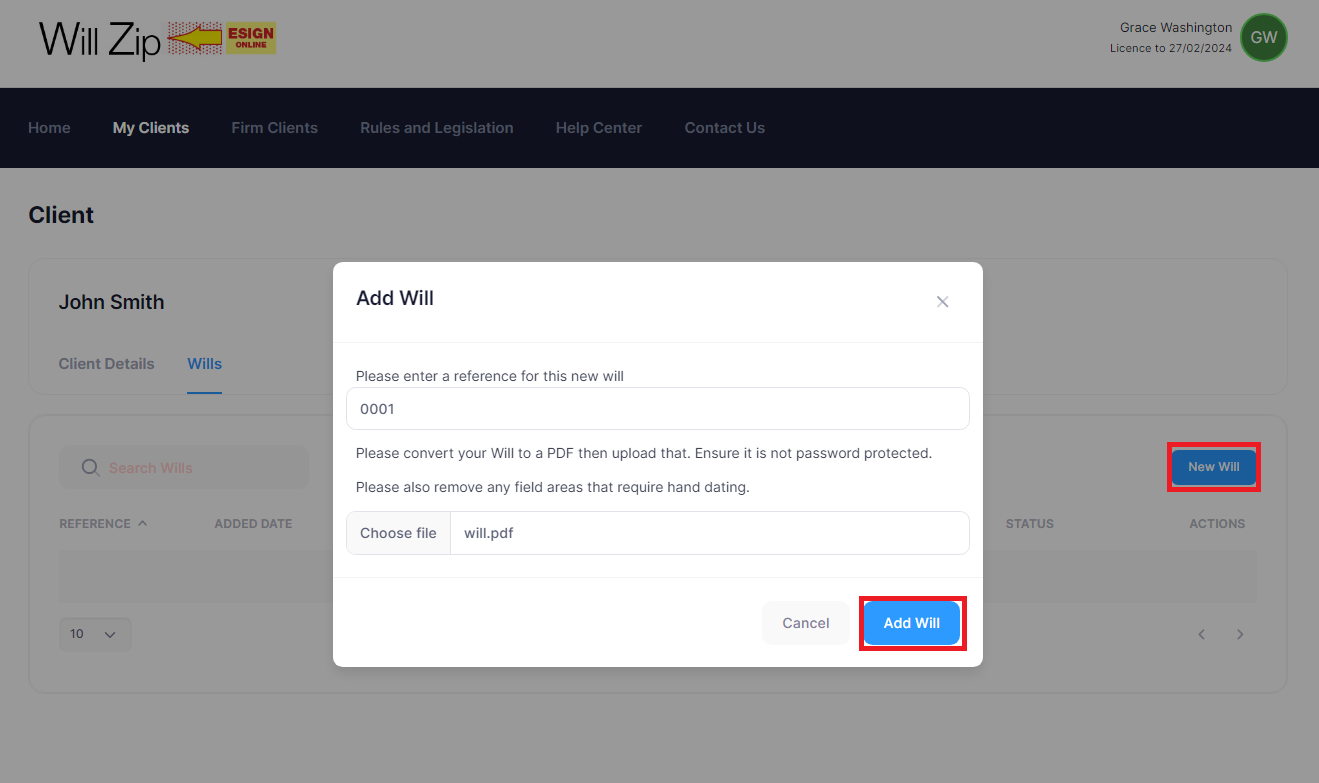
After clicking “Add Will”, the client’s will information will be updated and display new information regarding the will.
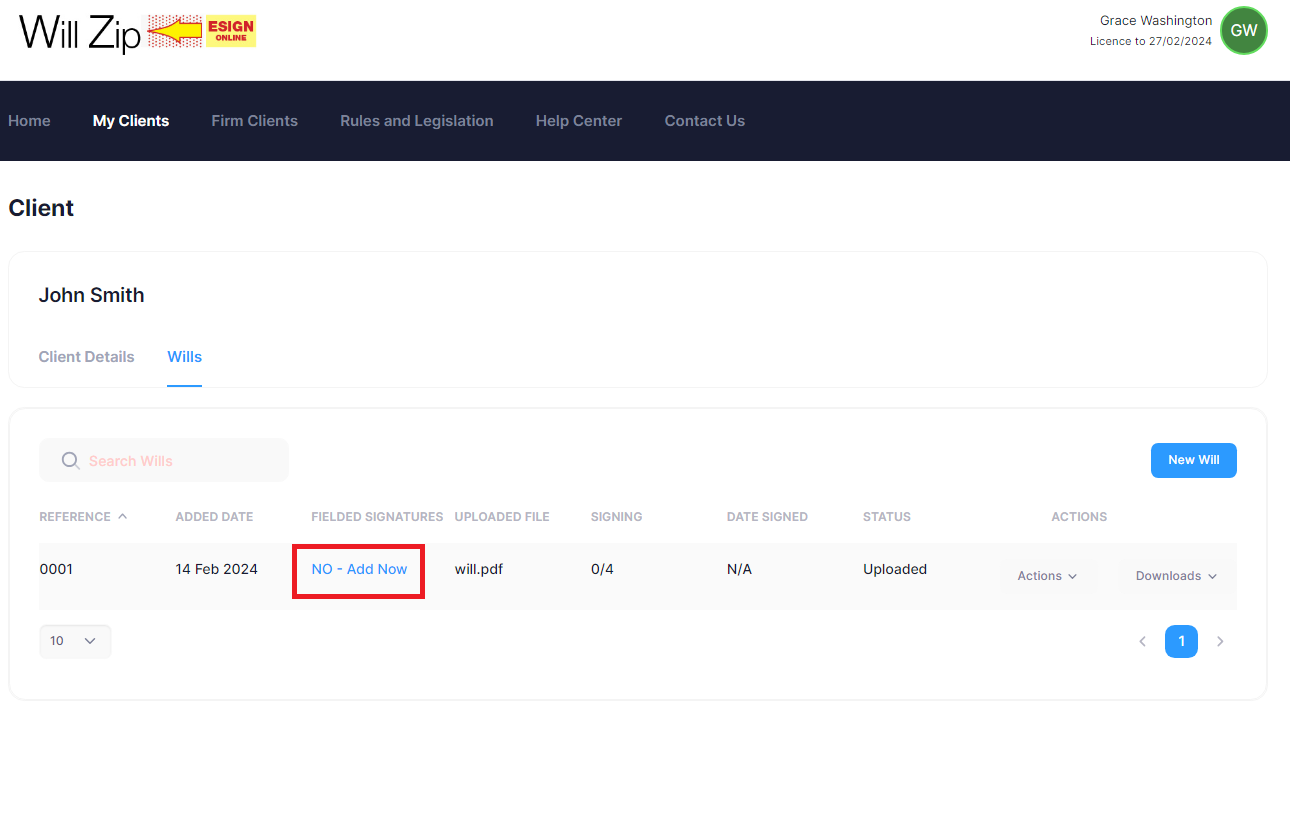
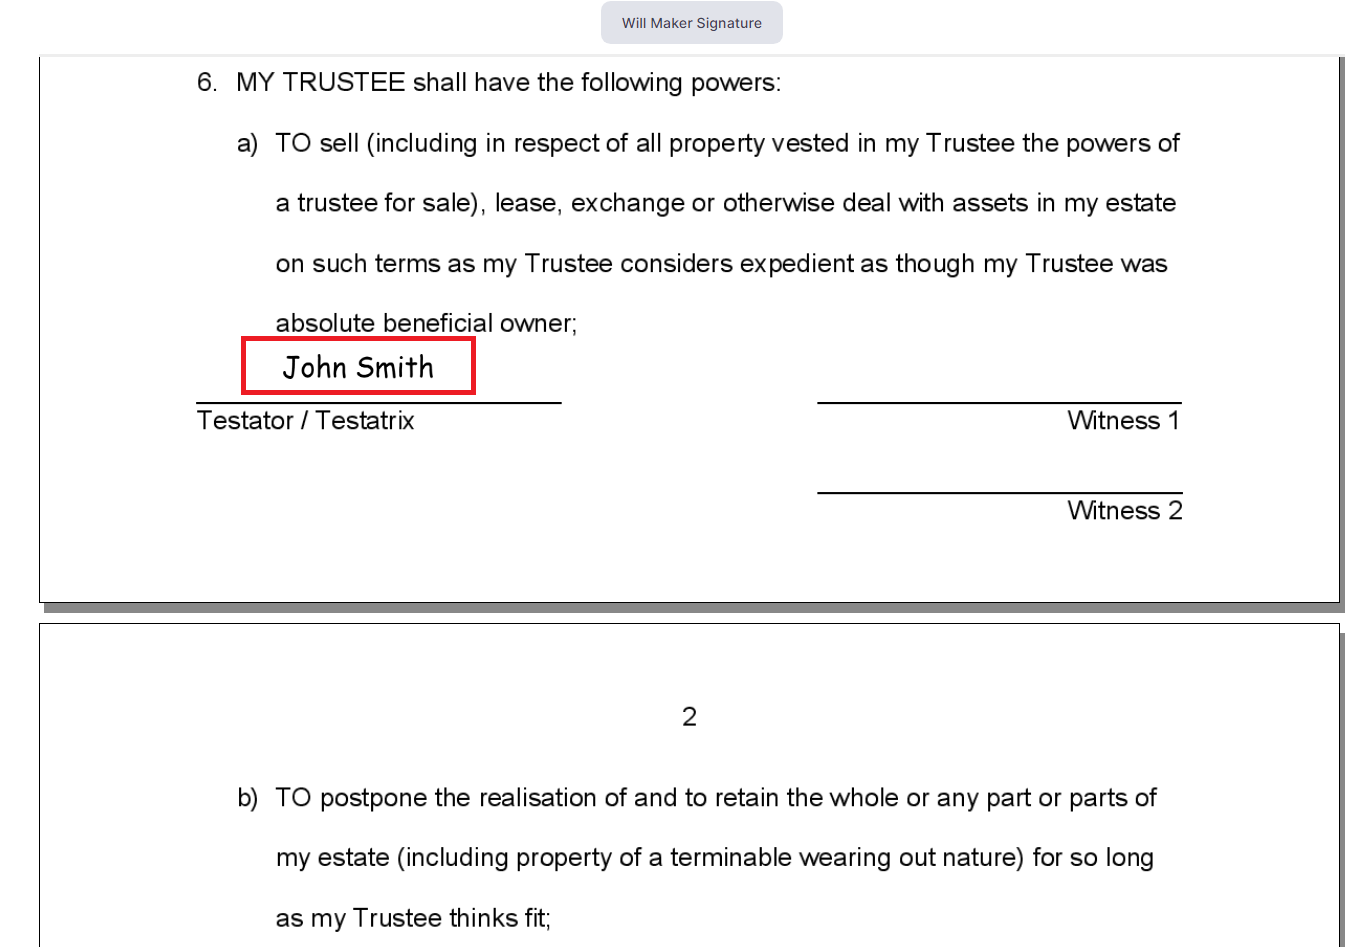
Adding Signature Positions
Before the will can be signed in an online meeting, the PDF of the will must be populated with signature positions.Below the “Fielded Signature’s” column, click on “NO - Add Now” and you will open the willl to insert the signatures.
You can navigate in the online will pages by clicking the side arrows of the page as you complete each page with signature positions.
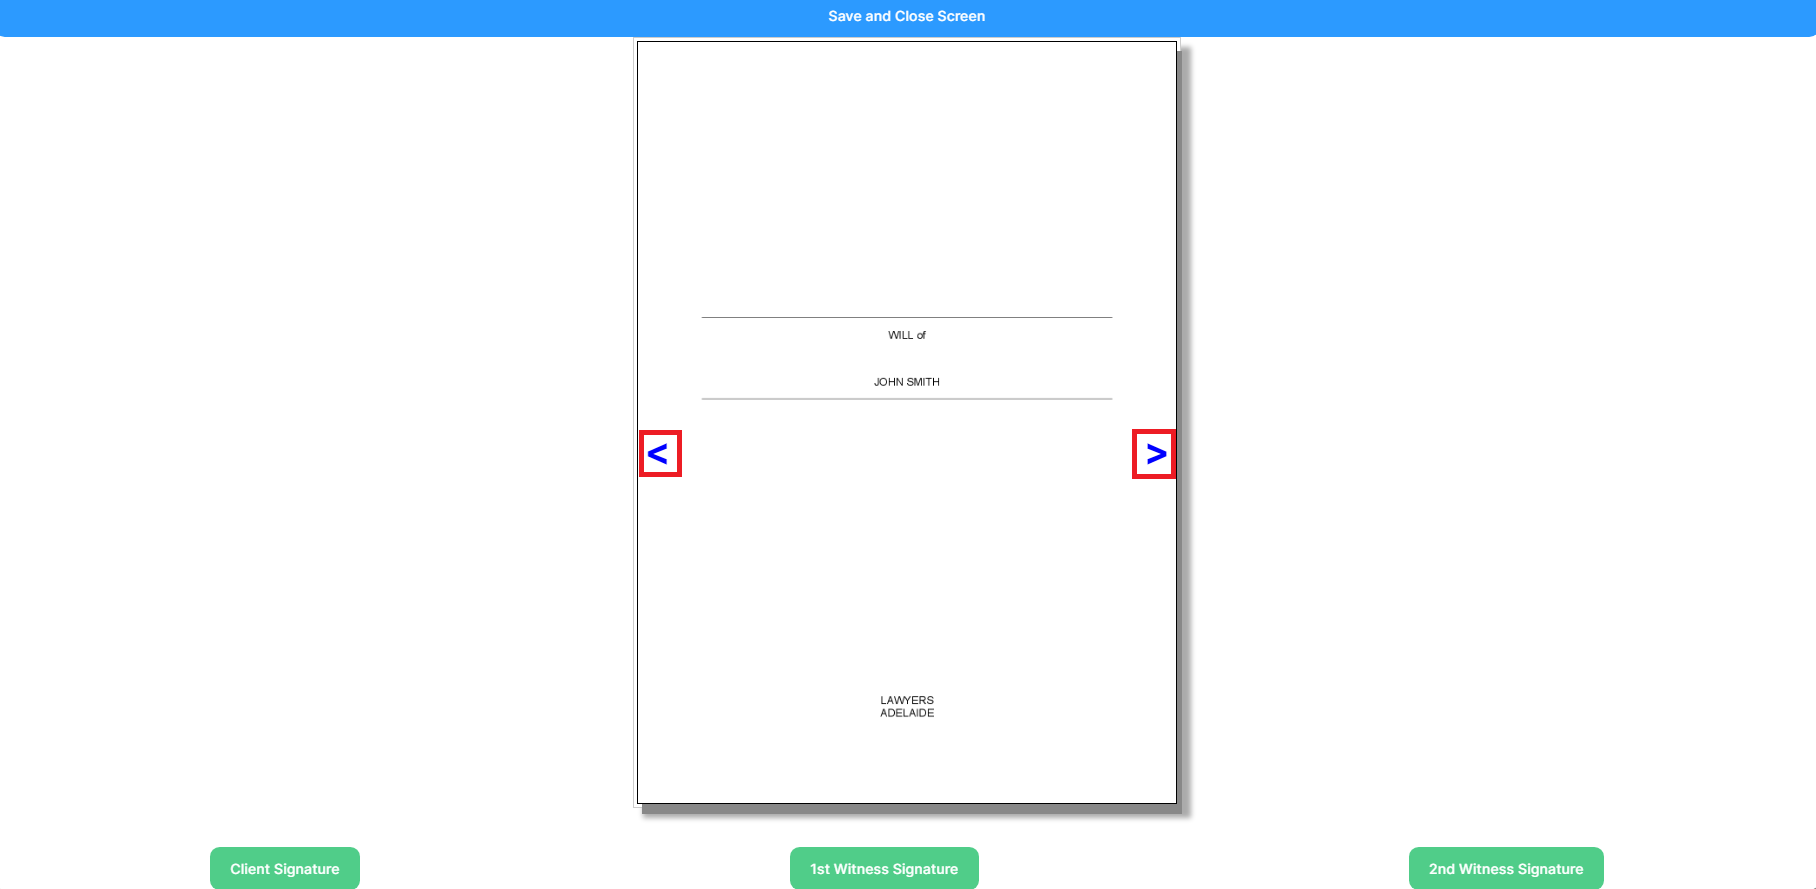
To insert signatures into the will, you must navigate to the page containing empty signature spaces. You can then insert the signature of the corresponding participant by clicking on one of the tags at the bottom of the page and placing it on the PDF.
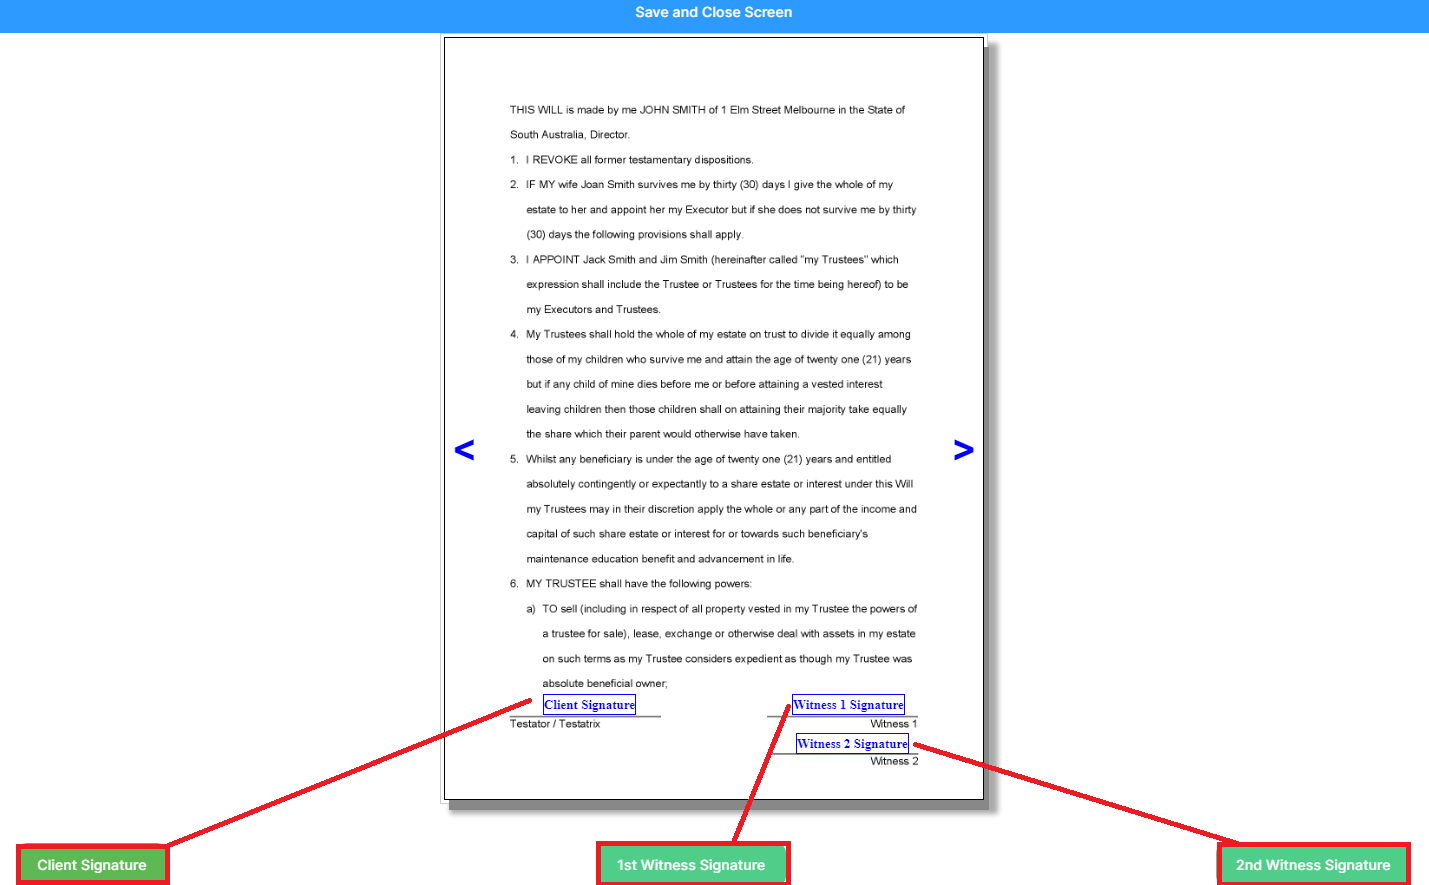
You can remove an inserted signature by manually clicking on the inserted signature you had just placed in the PDF and clicking “OK” to its removal.
After you have added all required signatures for your will, click “Save and Close Screen”.
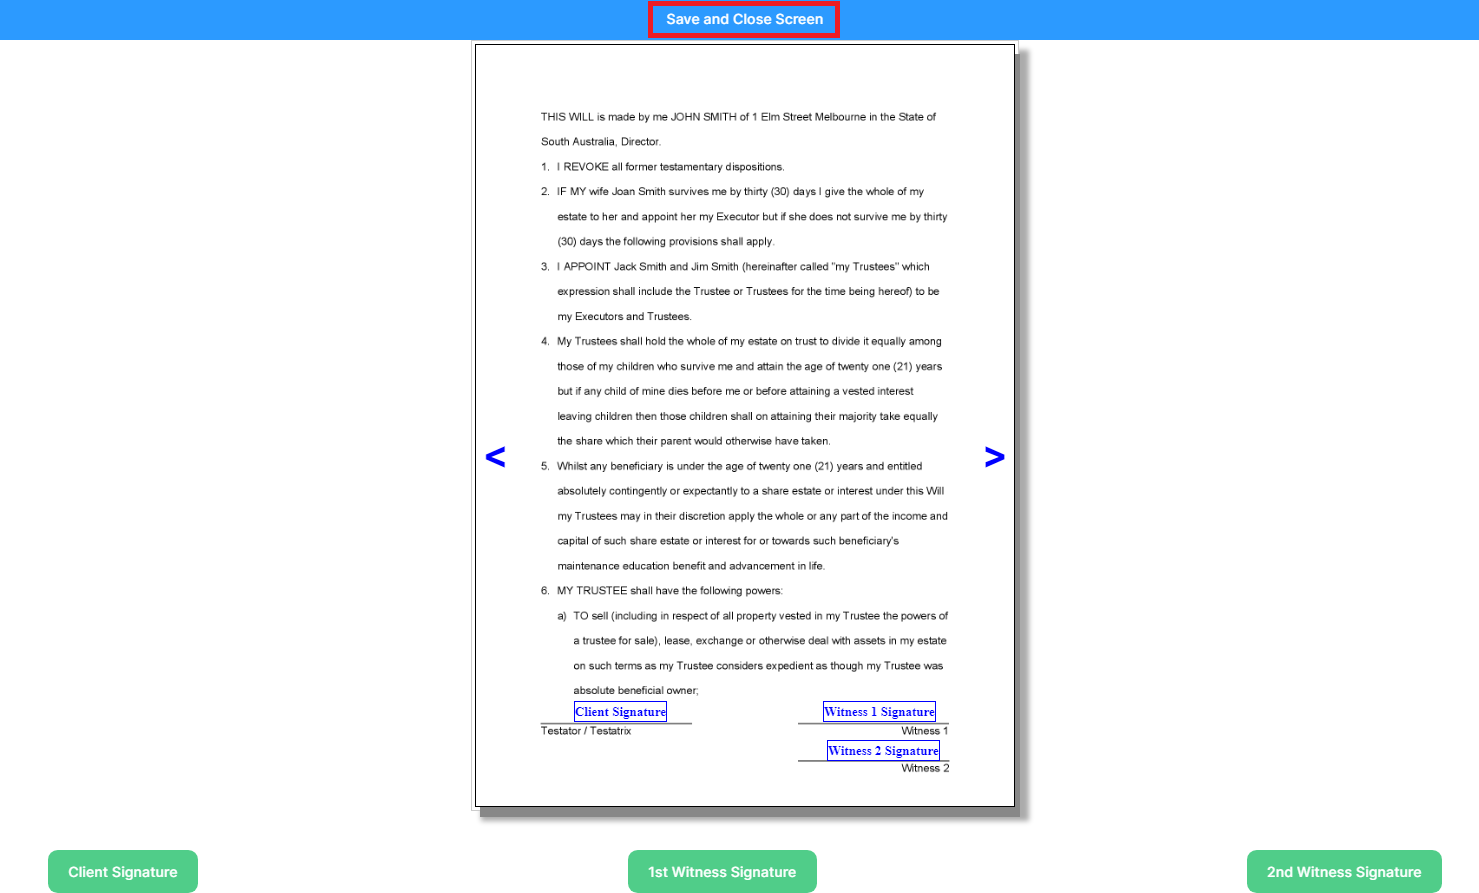
You should now be ready to make preparations for starting a video meeting for the signing of the will.
Set up Participants for Video Conference
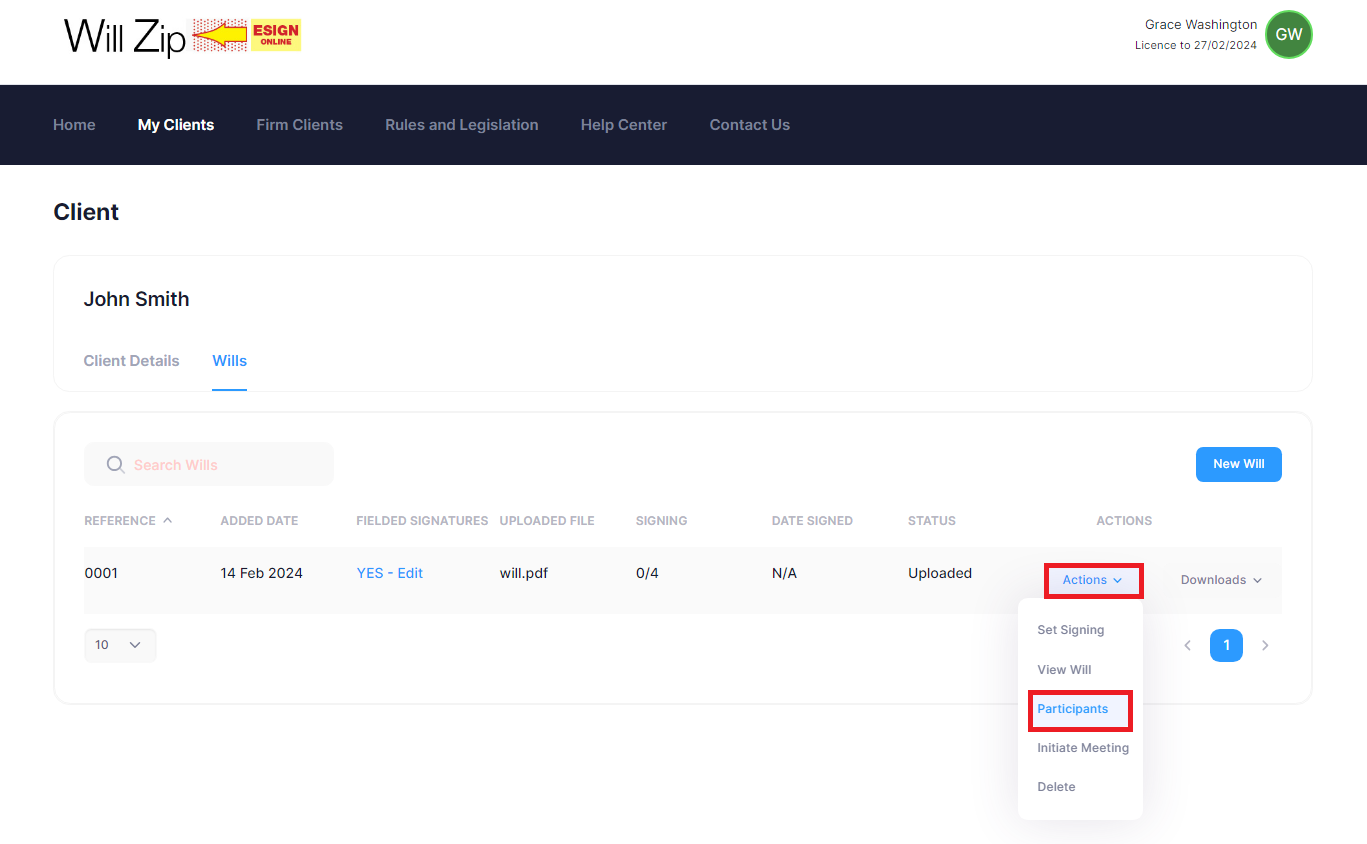
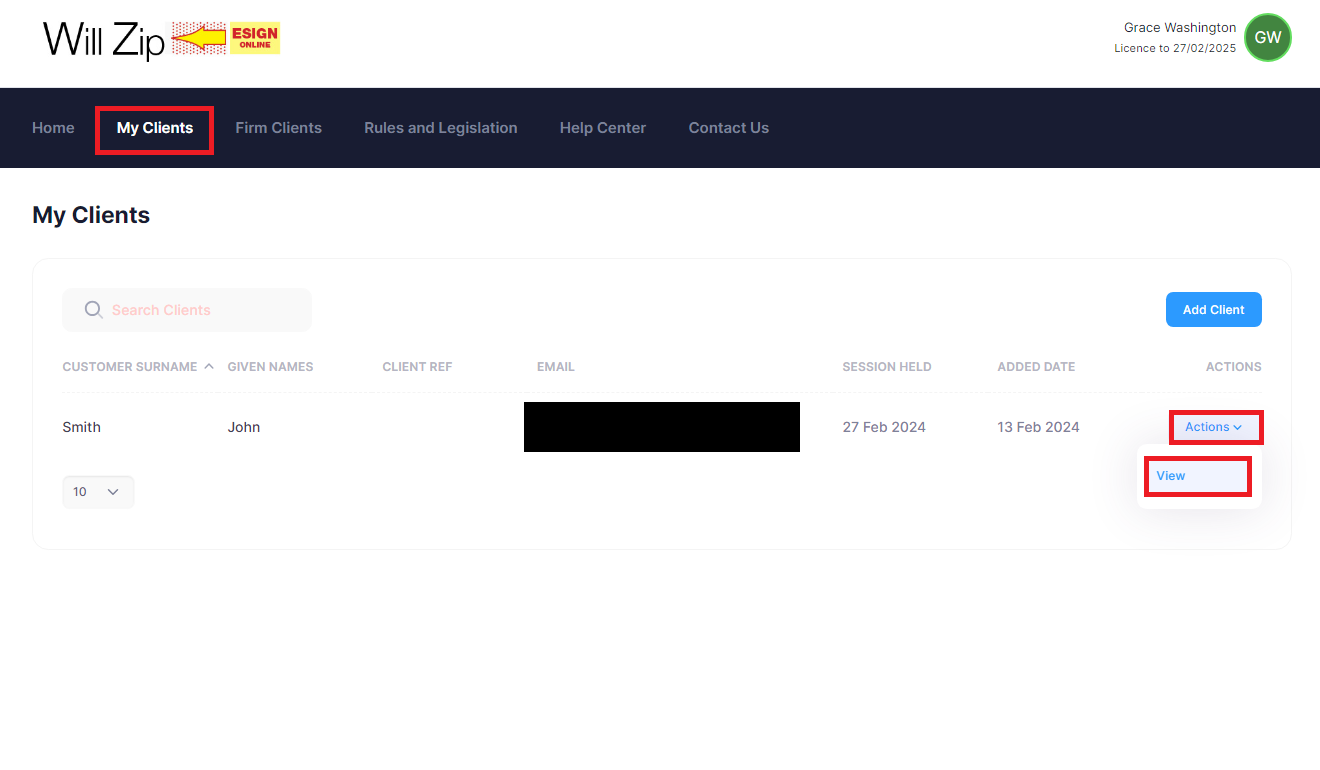
Go to the “My Clients” heading and select the client’s profile and “Action” on the right side of the row and then click “View”.

To set up the participants (or later edit)select “Actions” and then “Participants”.
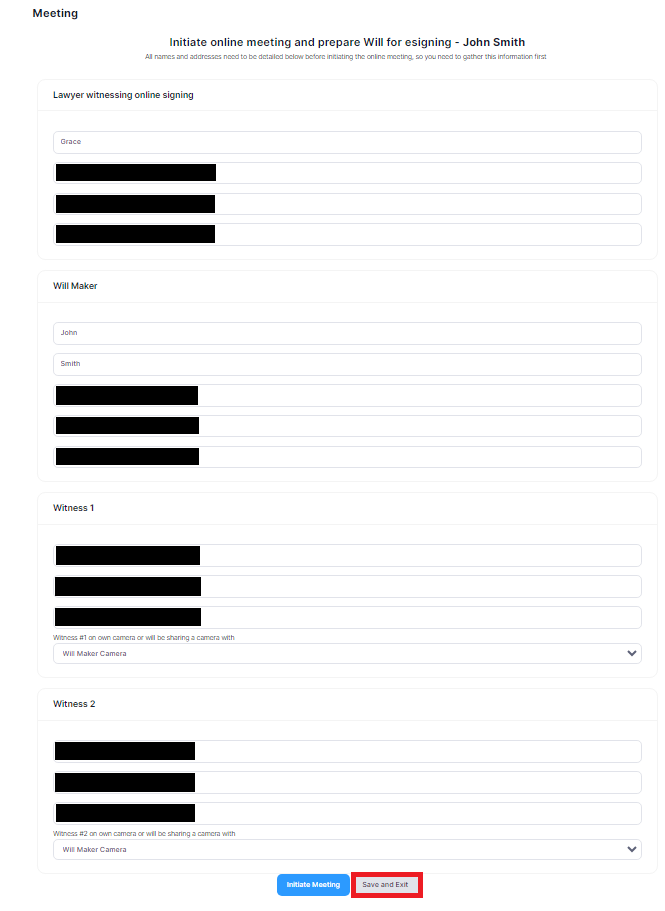
This will open the participants page. Here, you can see your details and the client’s detail inserted from the user’s profile information.
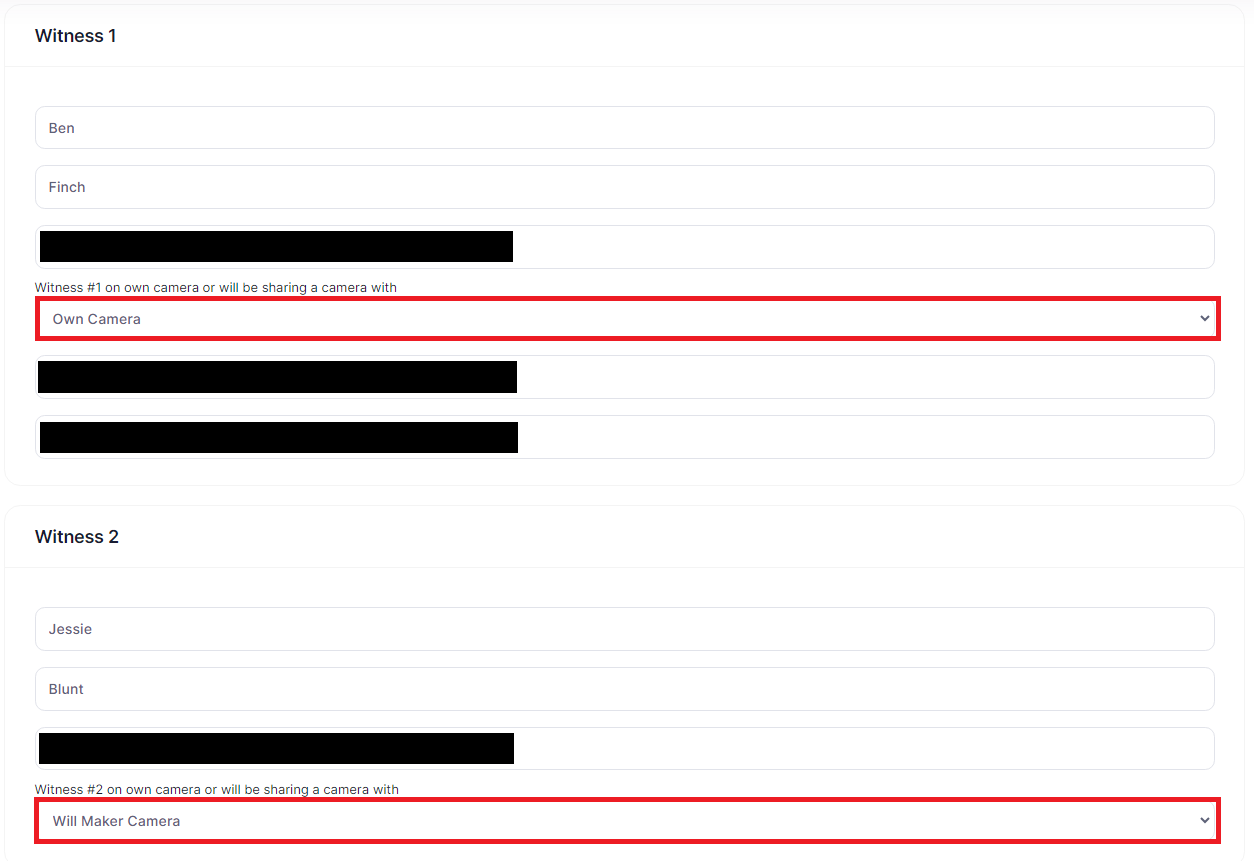
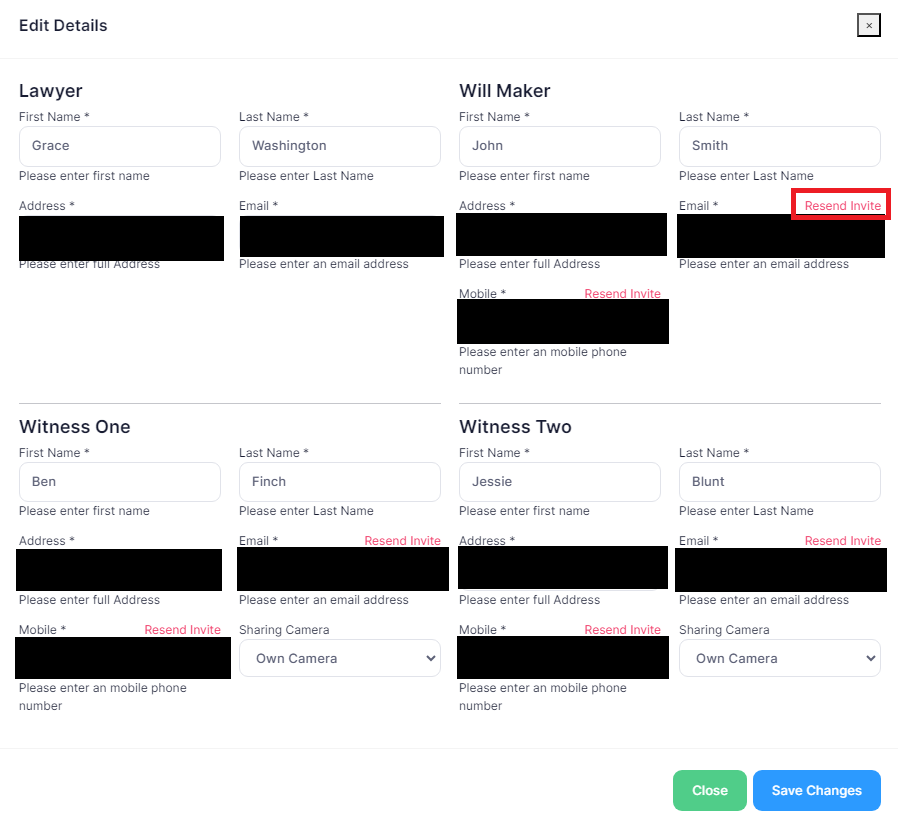
You can edit information for the will maker, witness 1 and witness 2.
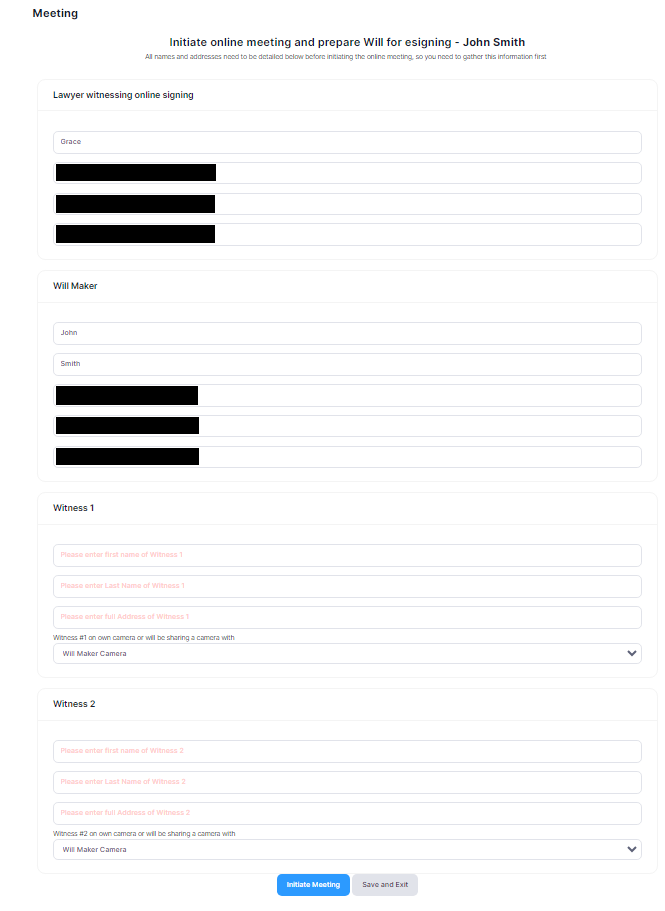
If a witness is in the same room as another participant, you can change the camera settings on the participant’s information to only use one camera and laptop between the two people or more people. An example is provided below, with Witness 1 using their own camera, but Witness 2 using the Will Maker’s camera.
Once all of the participant’s information is entered, click “Save and Exit”.
You are now ready to initiate a video conference.
Initiating a Video Conference Online
Go to “My Clients”, then choose which client you want to start a conference for by click “Actions” and select “View”.
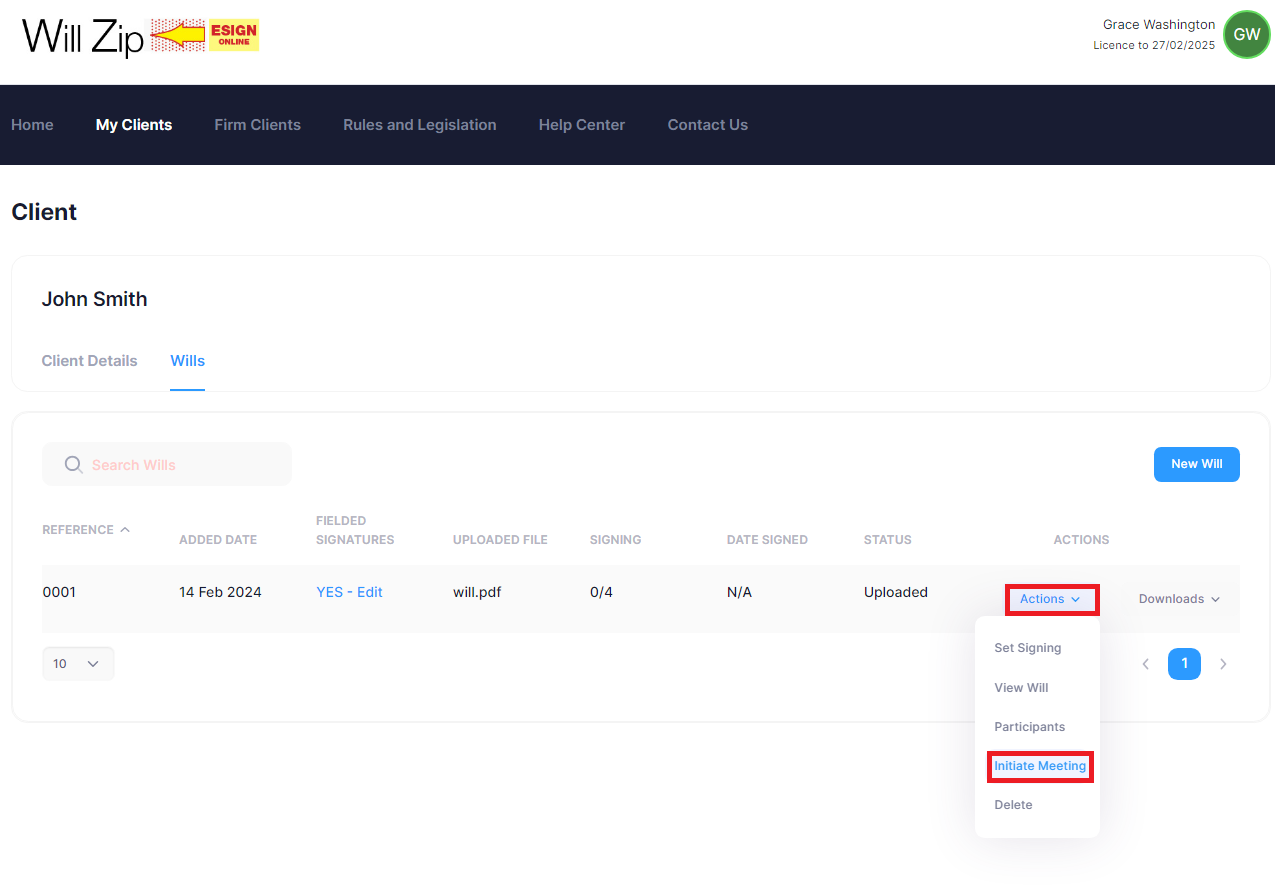
To start a video conference, click “Actions” and select “Initiate Meeting”.
If you have not correctly setup the participants for the video conference, a popup will show and take you to the participants page to amend the information.
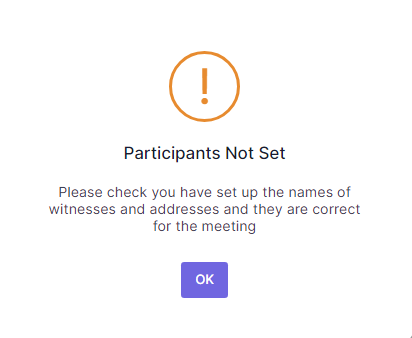
If all participant information has been correctly submitted, a popup will do a final check to ask you if you have set up the participants correctly. Click “Proceed with meeting” if all the participants’ information is correct.

Once a video conference has begun, the participants will be sent an email with a URL link to the video conference in order to sign the will. They will also be sent an SMS to their phone with a URL link to the video conference so that other participants can see and hear them while signing the will. Here is an example of the layout for a video conference with all participants having their own camera from the lawyer’s perspective.

If any of the participant’s information was entered incorrectly, you can change that information by clicking “Edit Participants”.

You can change a participant’s email and or phone number and resend the meeting links to participants.
Once all participants have entered the conference through their email and phone, the will signing proceedings can continue. If all participants consent to being recorded, click “Record”. The recording will continue until the button is clicked again or the lawyer manually ends the conference.

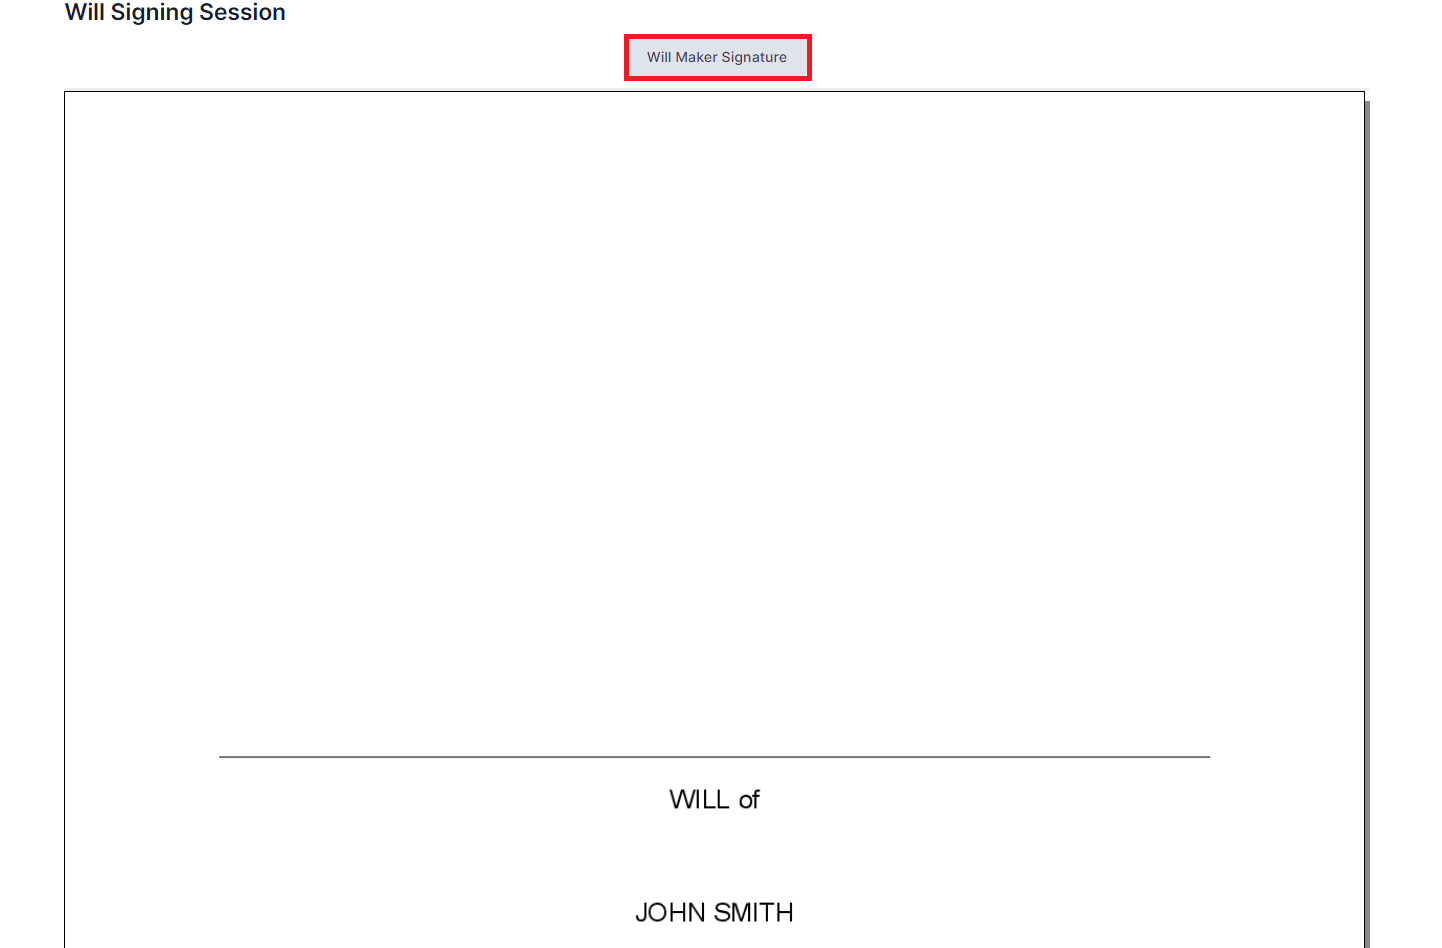
Now signing can begin. The signing process works by the will maker signing first, the two witnesses signing next and the lawyer signing last. To allow signing, click “Allow Signing”.

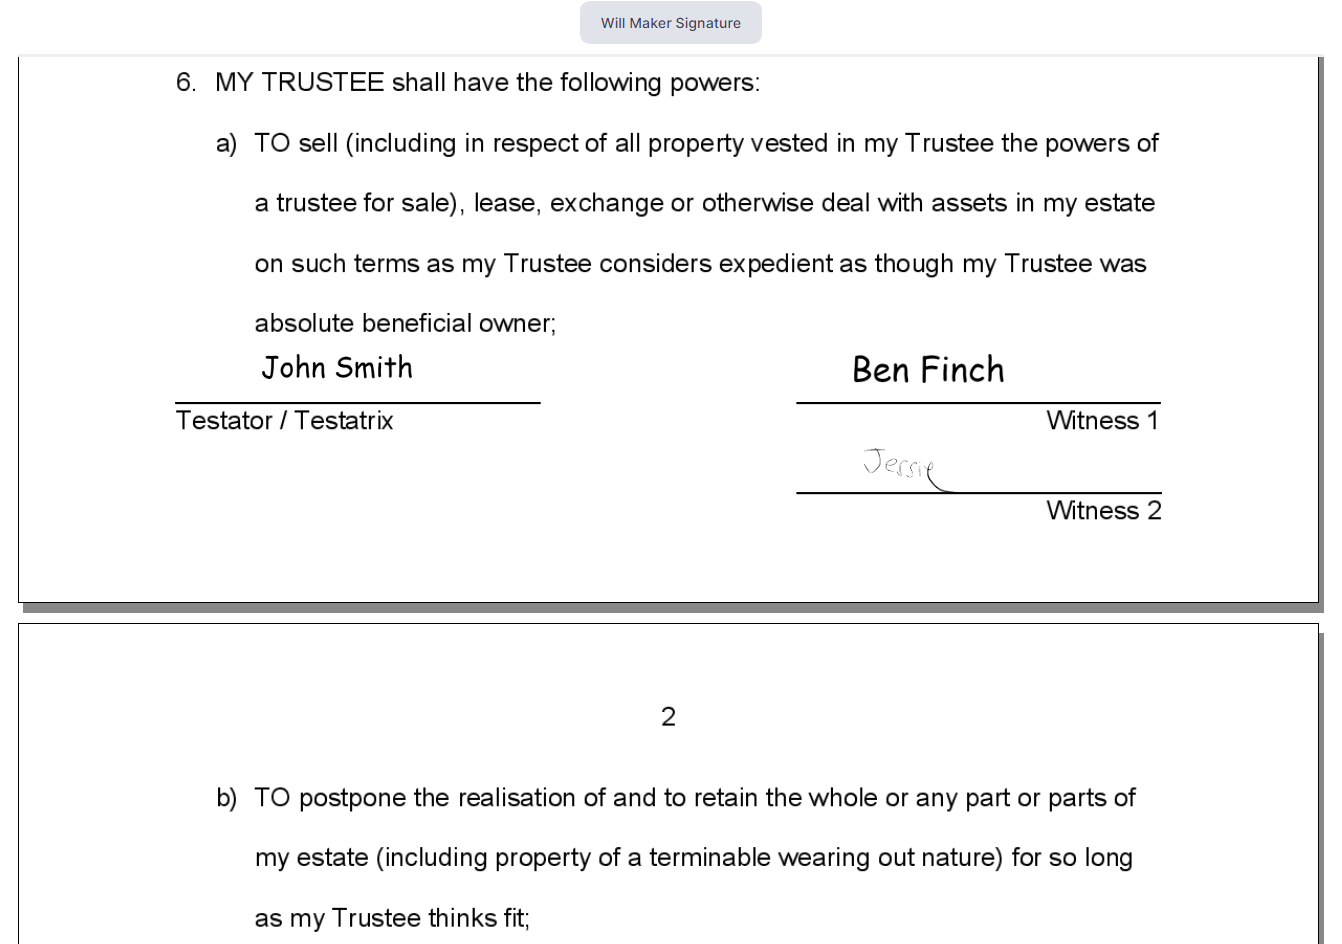
The Will maker can now sign the will by click “Will Maker Signature”, as seen from their perspective.
The will maker can either sign the will by using a “Typed Signature” or a “Drawn Signature”. After selecting the type of signature and ticking the conditions below, click “Save Signature”.
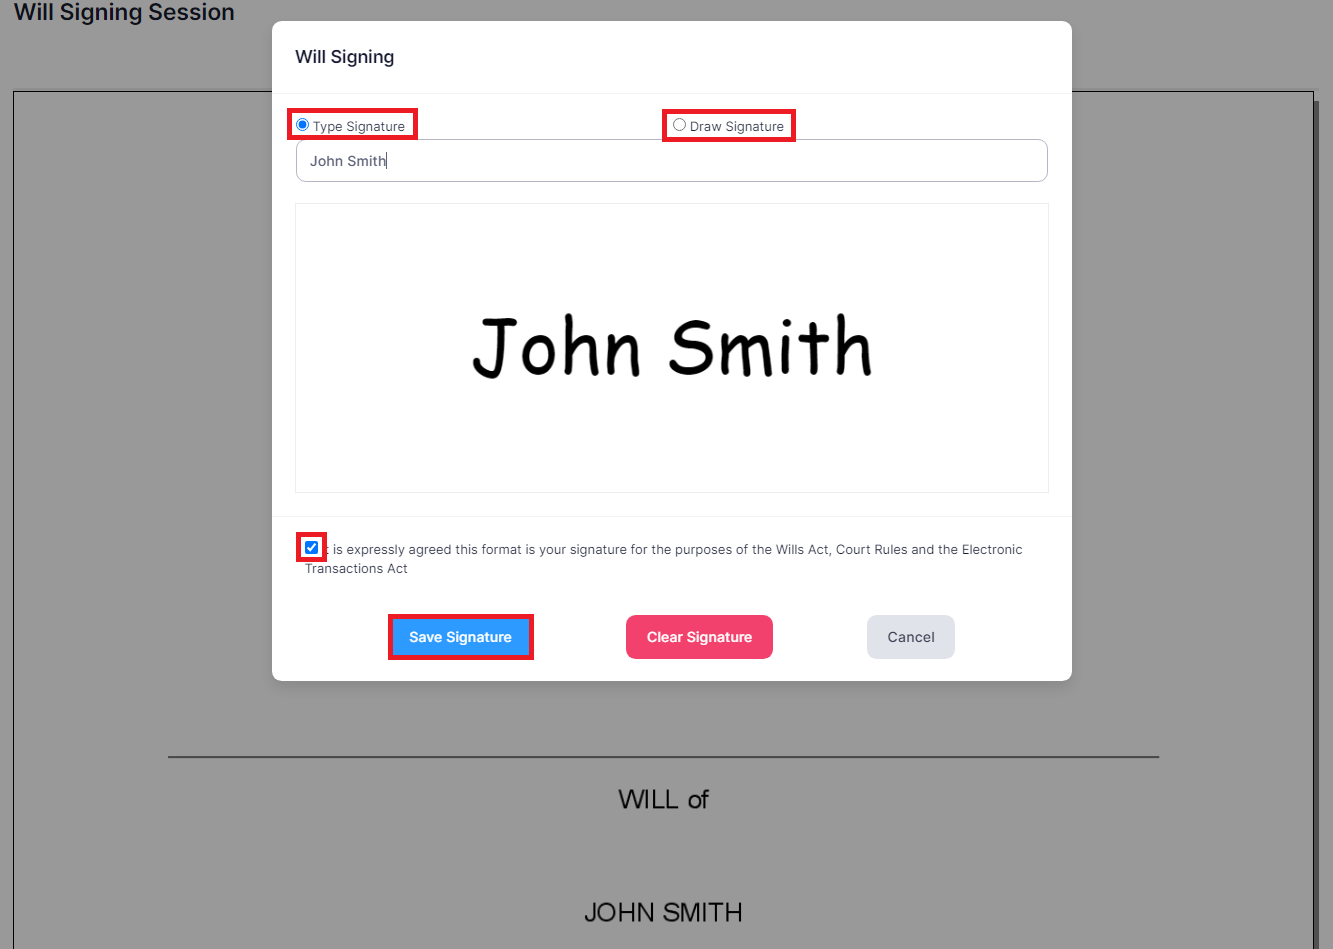
After saving the signature, it can be seen inserted into the will itself in the signature points assigned to the will maker.
The will maker is able to change their signature, but only if the witnesses have not signed the will yet. If the will maker has finished signing, the witnesses can now sign the document, which follows the same steps as the will maker.
Once the witnesses are finished signing, the lawyer can now sign, which is the same process as the will maker and witnesses. After the lawyer has signed, the will has been completed and the video conference can end. To end the video conference, click “”

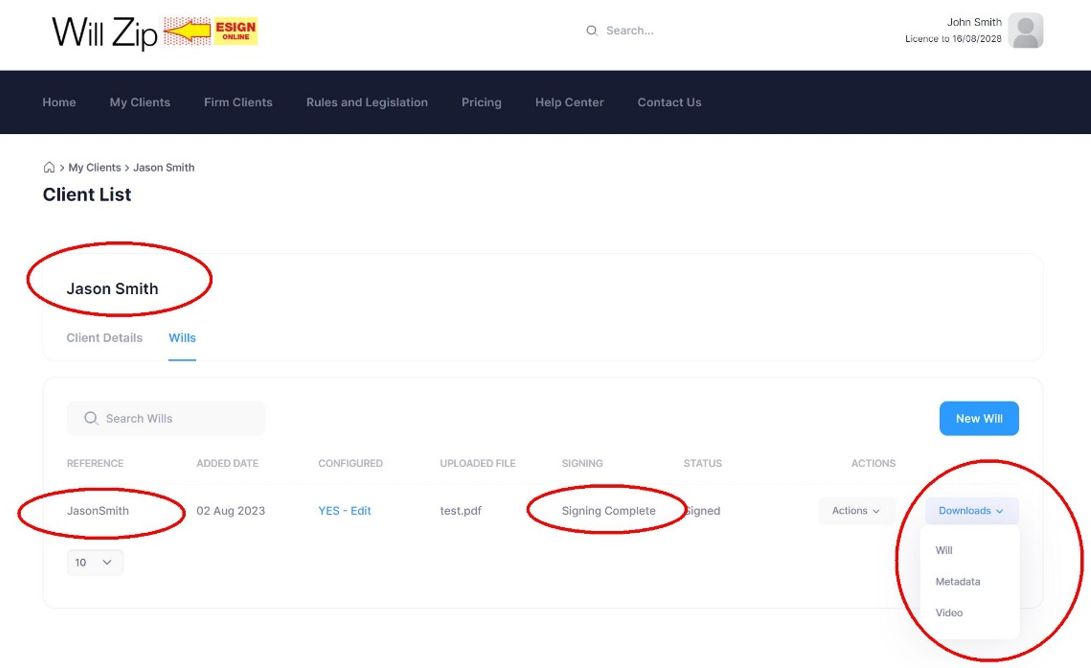
After a successful video conference has ended and was recorded, an email containing the signed will and useful IP metadata will be sent to the lawyer’s email. An additional email will be sent when the recording of the conference has finished compiling and is ready for download. To manually download any of this information, go back to the client’s page and click the dropdown “Downloads”.
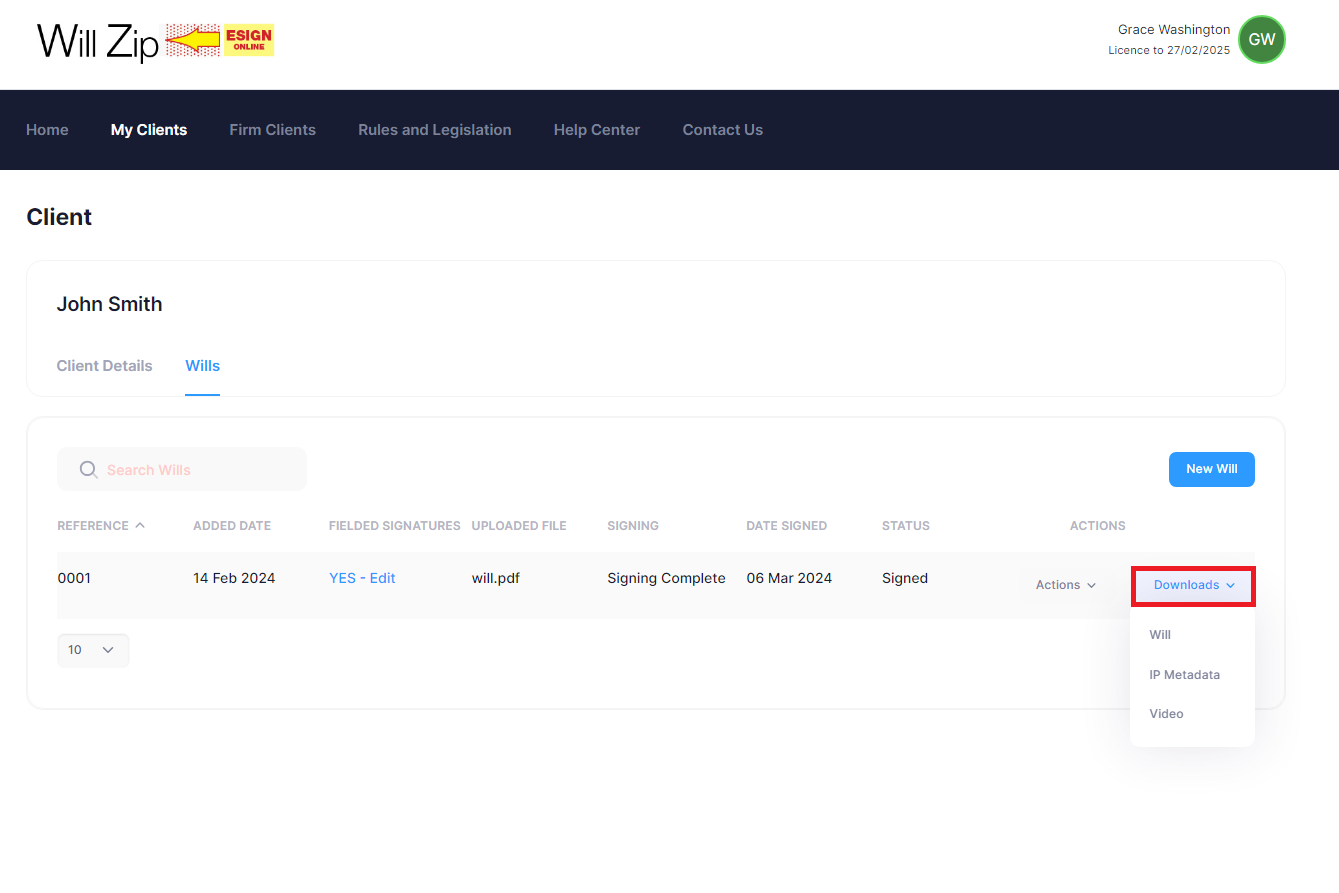
Accessing your signed Wills and Data
Go to the Client and see Downloads and download signed Will, meta data and video to your own document management system
Managing your law firm account
Go to your name Menu then Settings then the actions are in tabs on screen
Create Users and manage to Delete Users and add a Manager
Create a User and an email is sent to them informing and asking to set a passcode